


-
Type
- Dante
- Networking
- Control
-
System Management
- Composer Management Software
- SymVue Screen Authoring
- AV-Ops Center Remote Monitoring
- ARC-WEB Control Interface Signal Processing
- D100 AVoIP DSP Server
- Radius NX AVoIP DSP
- Prism AVoIP DSP
- Edge AVoIP DSP
- DSP I/O Expansion Cards
- Jupiter DSP
- Zone Mix 761 DSP I/O Connectivity
- xIO Bluetooth Endpoints
- xIO XLR Endpoints
- xIO AVoIP DSP Audio Expanders Control Systems
- T-Series Touchscreen Controllers
- W-Series Controllers
- Control Server for Personal Devices
- xControl GPIO Expander
- ARC-Series Controllers
How to use Attero Tech Dante endpoints in Composer
Product:Composer Management Software
Manufacturer: Attero Tech
Type: Dante
Type: Control
1) Open Composer and create a blank Site File or open an existing one.
Note: Connecting to Dante capable Attero Tech endpoint requires a DSP such as the Edge, Radius NX, or Prism.
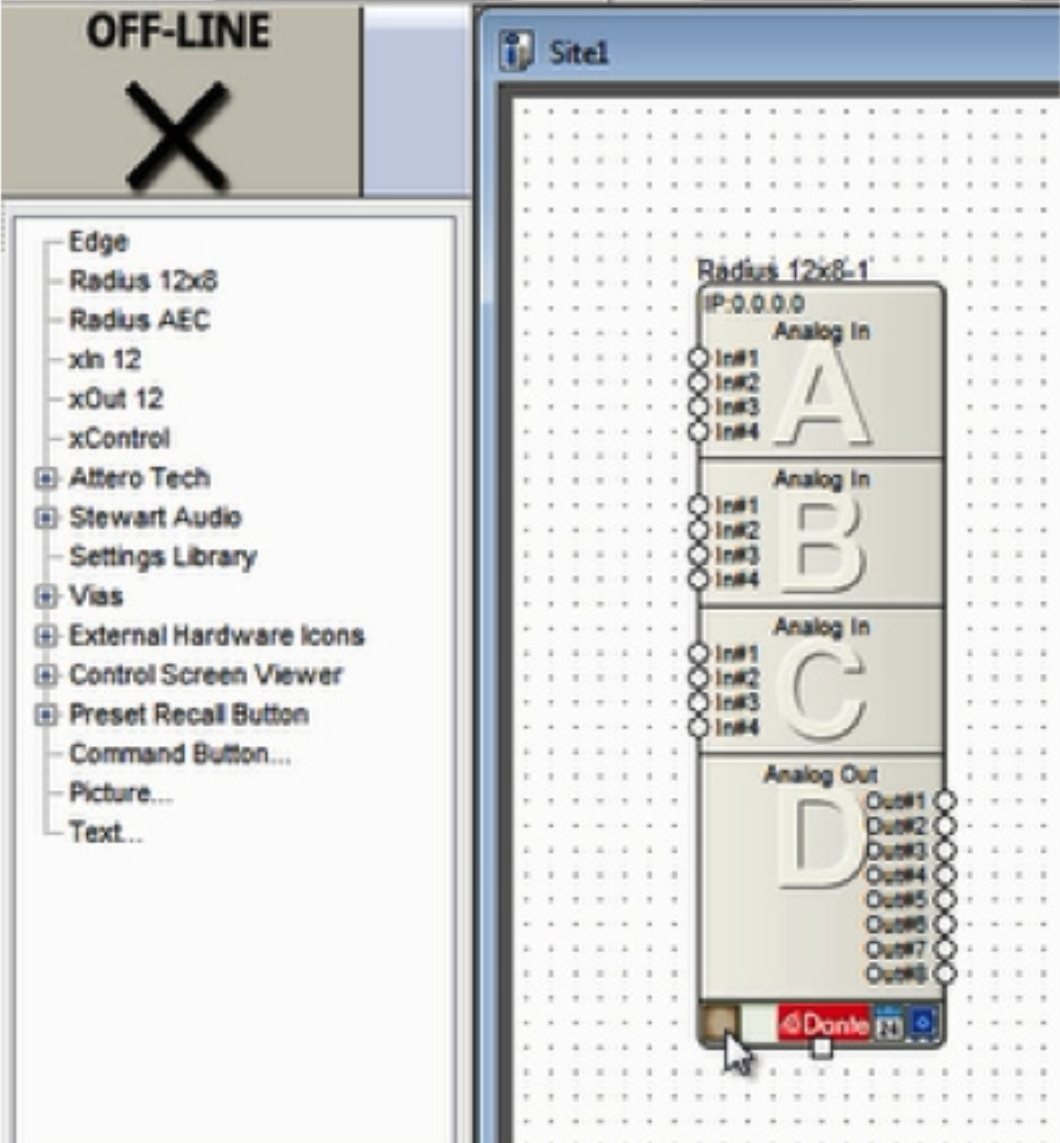
2) If starting with a blank Site File, first drag a DSP into the Configuration from the Toolkit.
3) Locate a DSP by clicking the brown box in the lower left hand corner of its unit icon
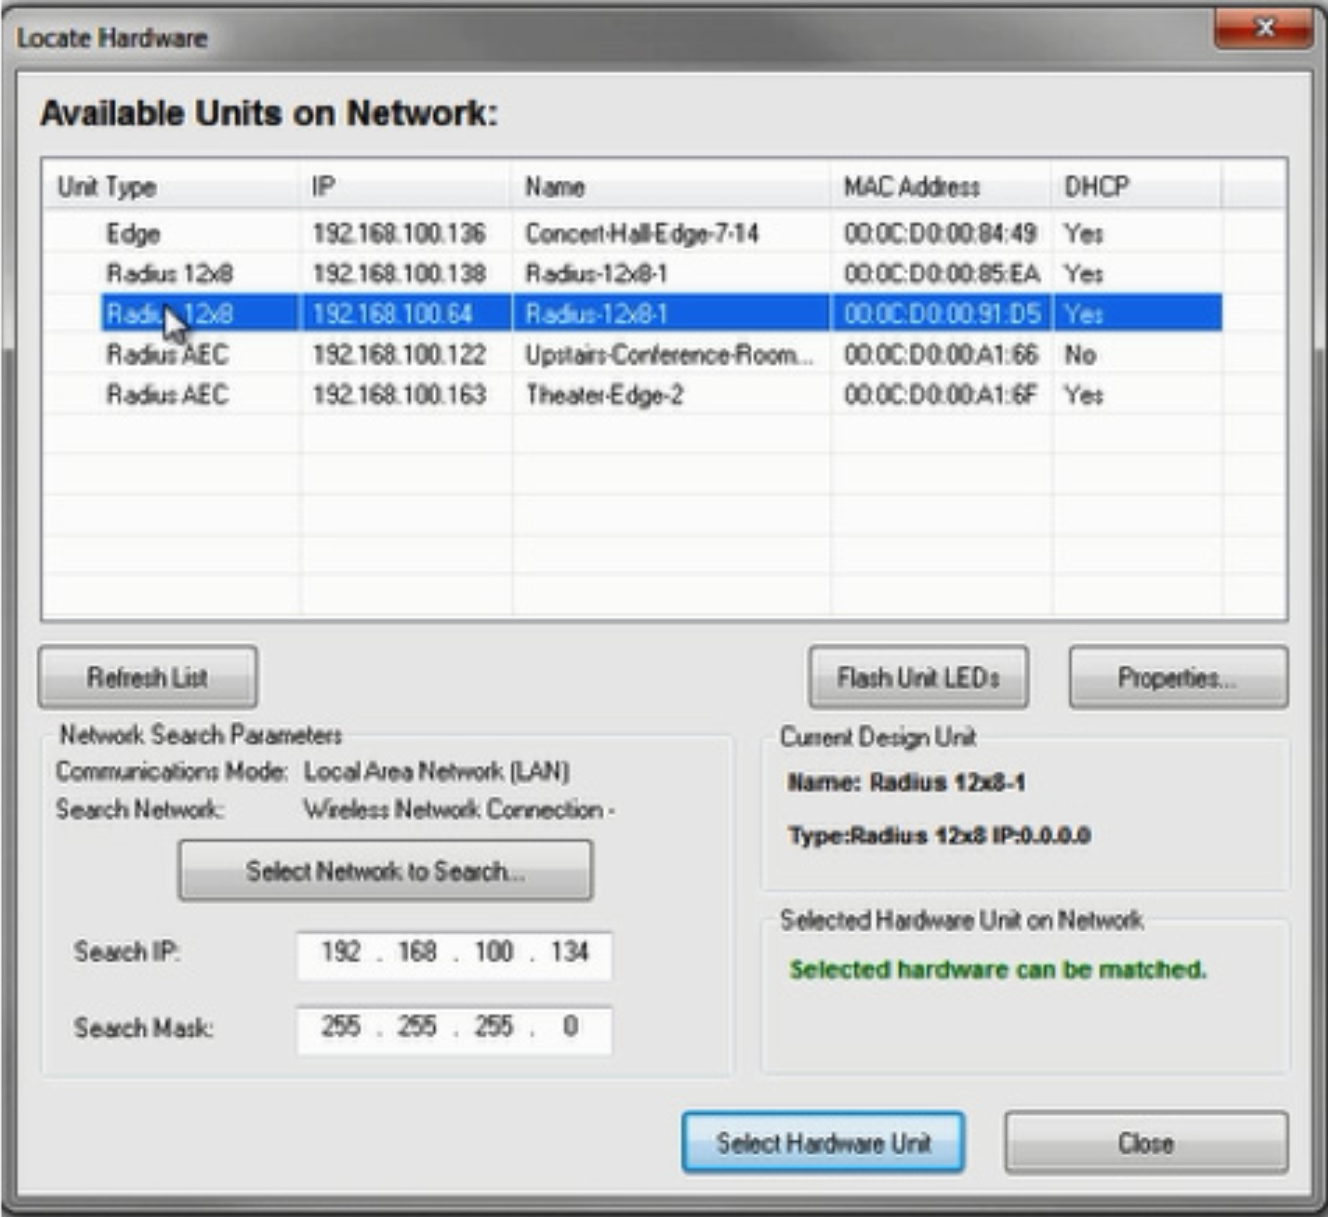
4) Select the DSP in the list of “Available Units on Network” by double-clicking it.
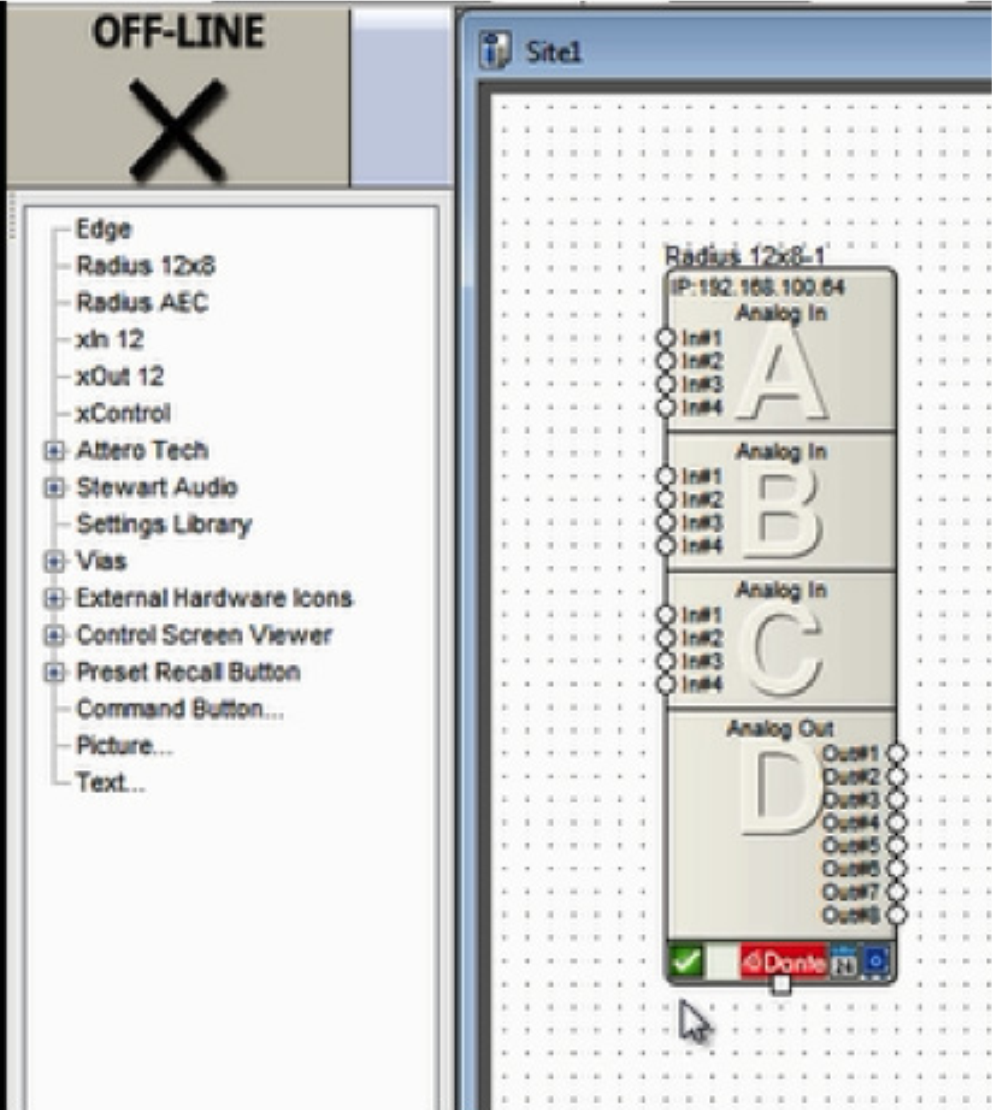
5) A green check indicates the DSP has been located and can now be used to connect to a Dante capable Attero Tech endpoint.
6) Drag a supported Attero Tech device into the Configuration from the Toolkit.
att 1
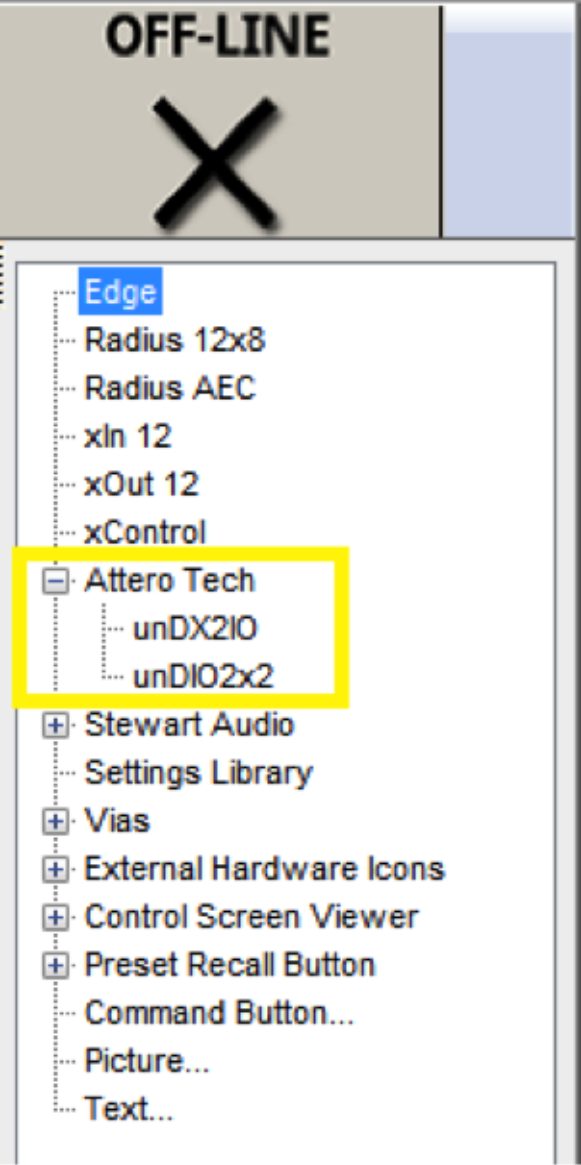
6) Drag a supported Attero Tech device into the Configuration from the Toolkit.
7) Click the brown box in the lower left hand corner of its unit icon to locate it.
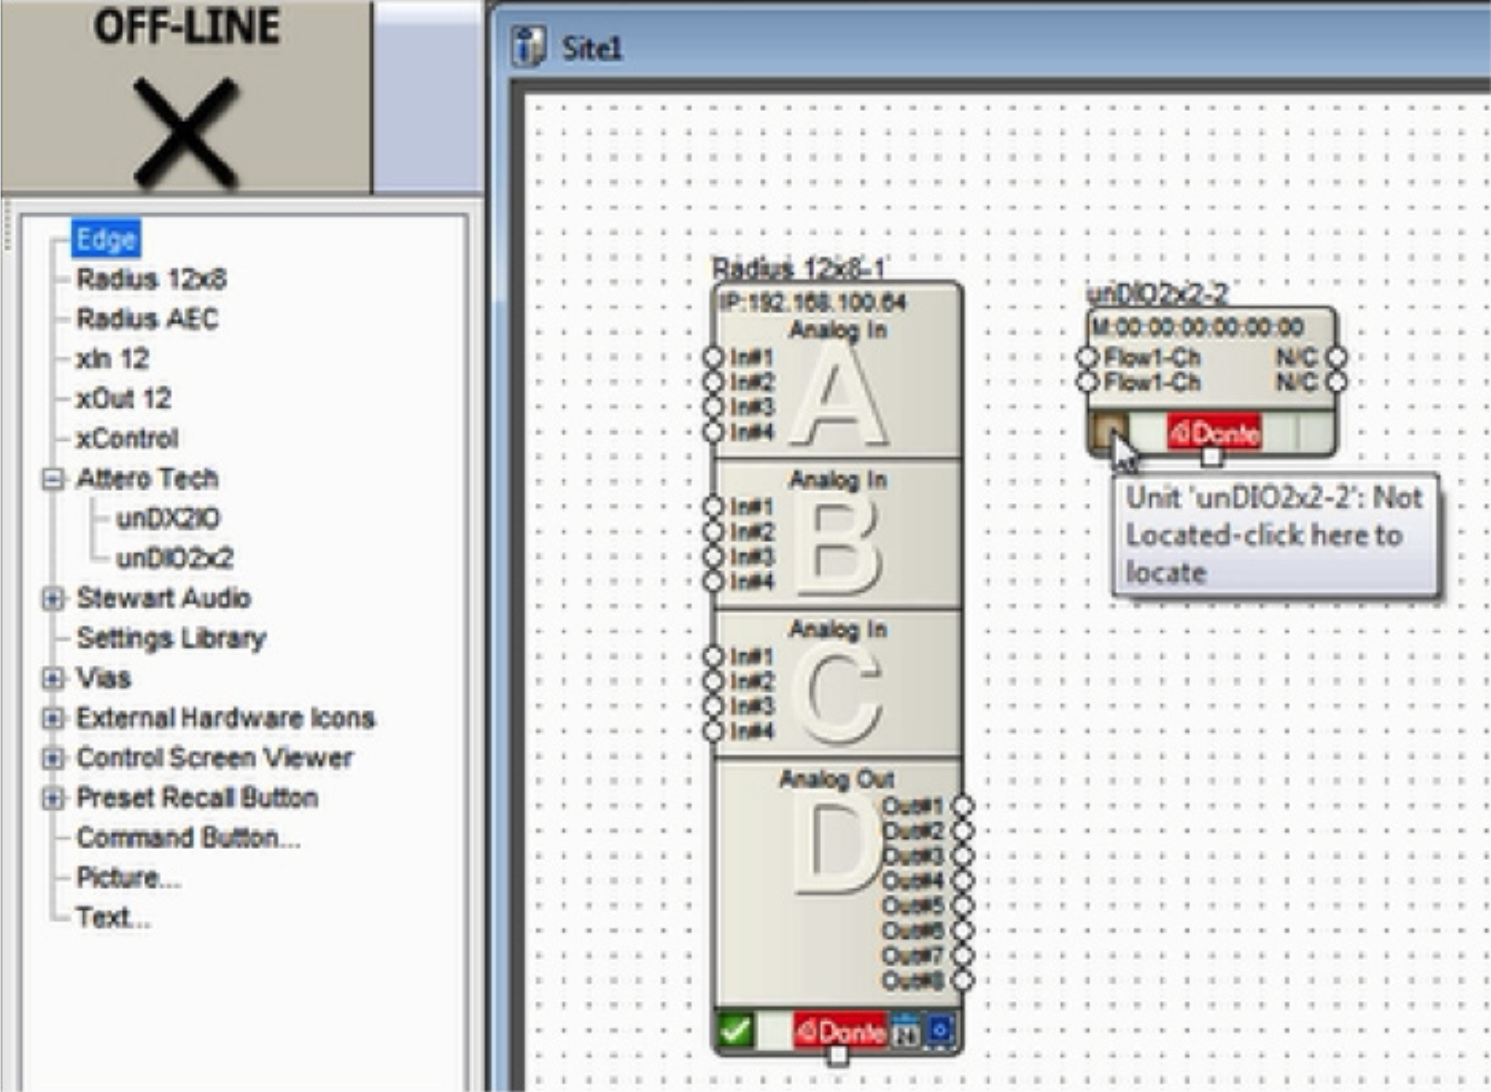
8) Composer will search the currently located DSP’s Dante network for the Attero Tech model in the configuration. Double-click on its Name field to select it.
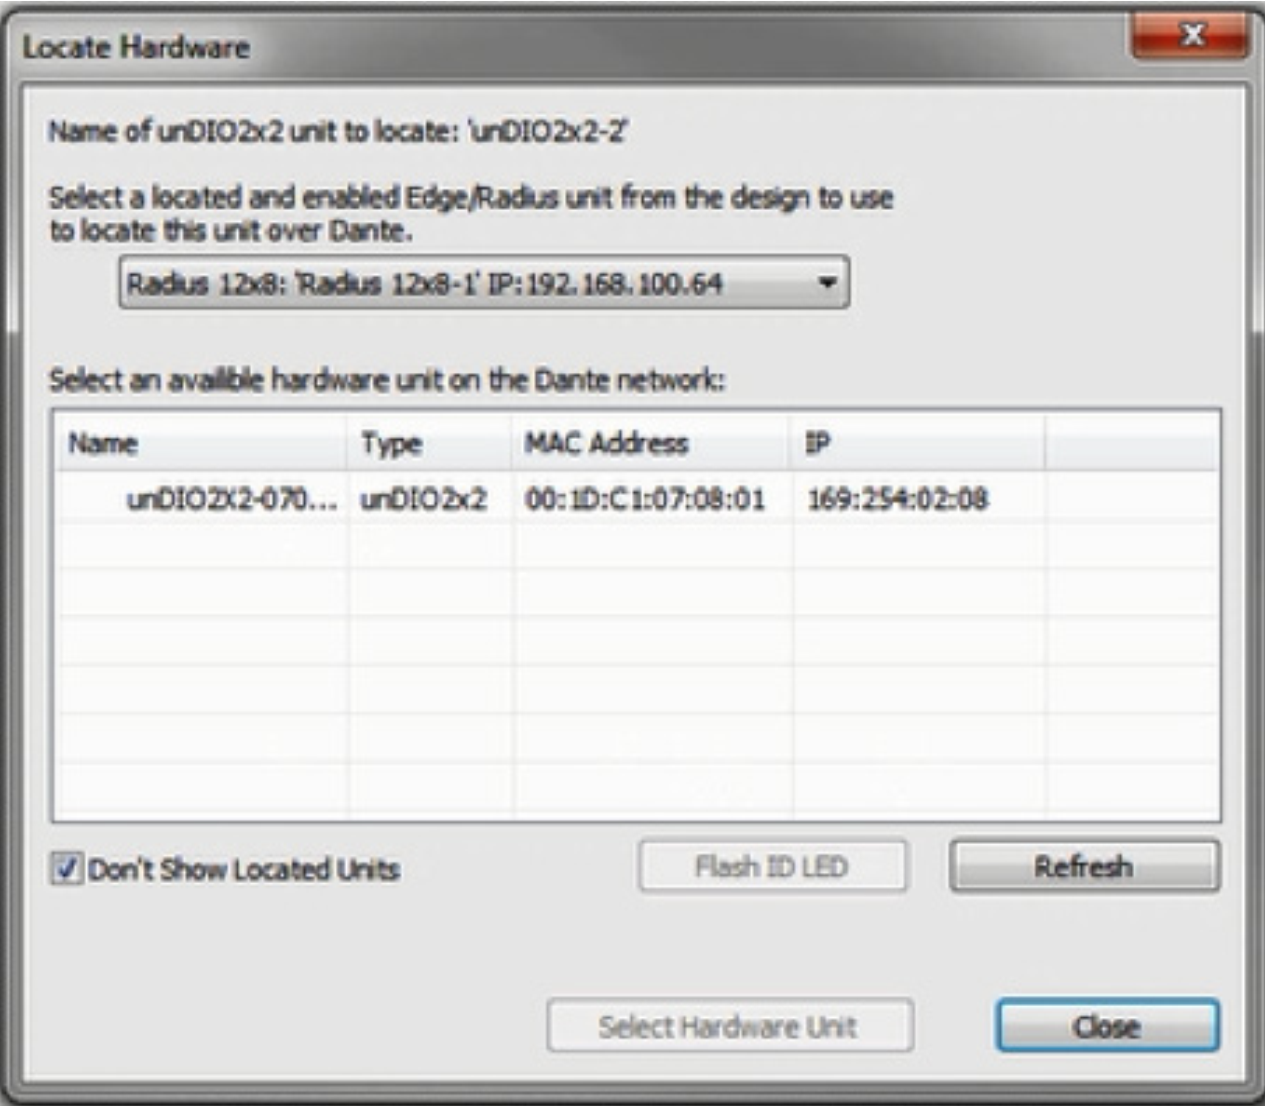
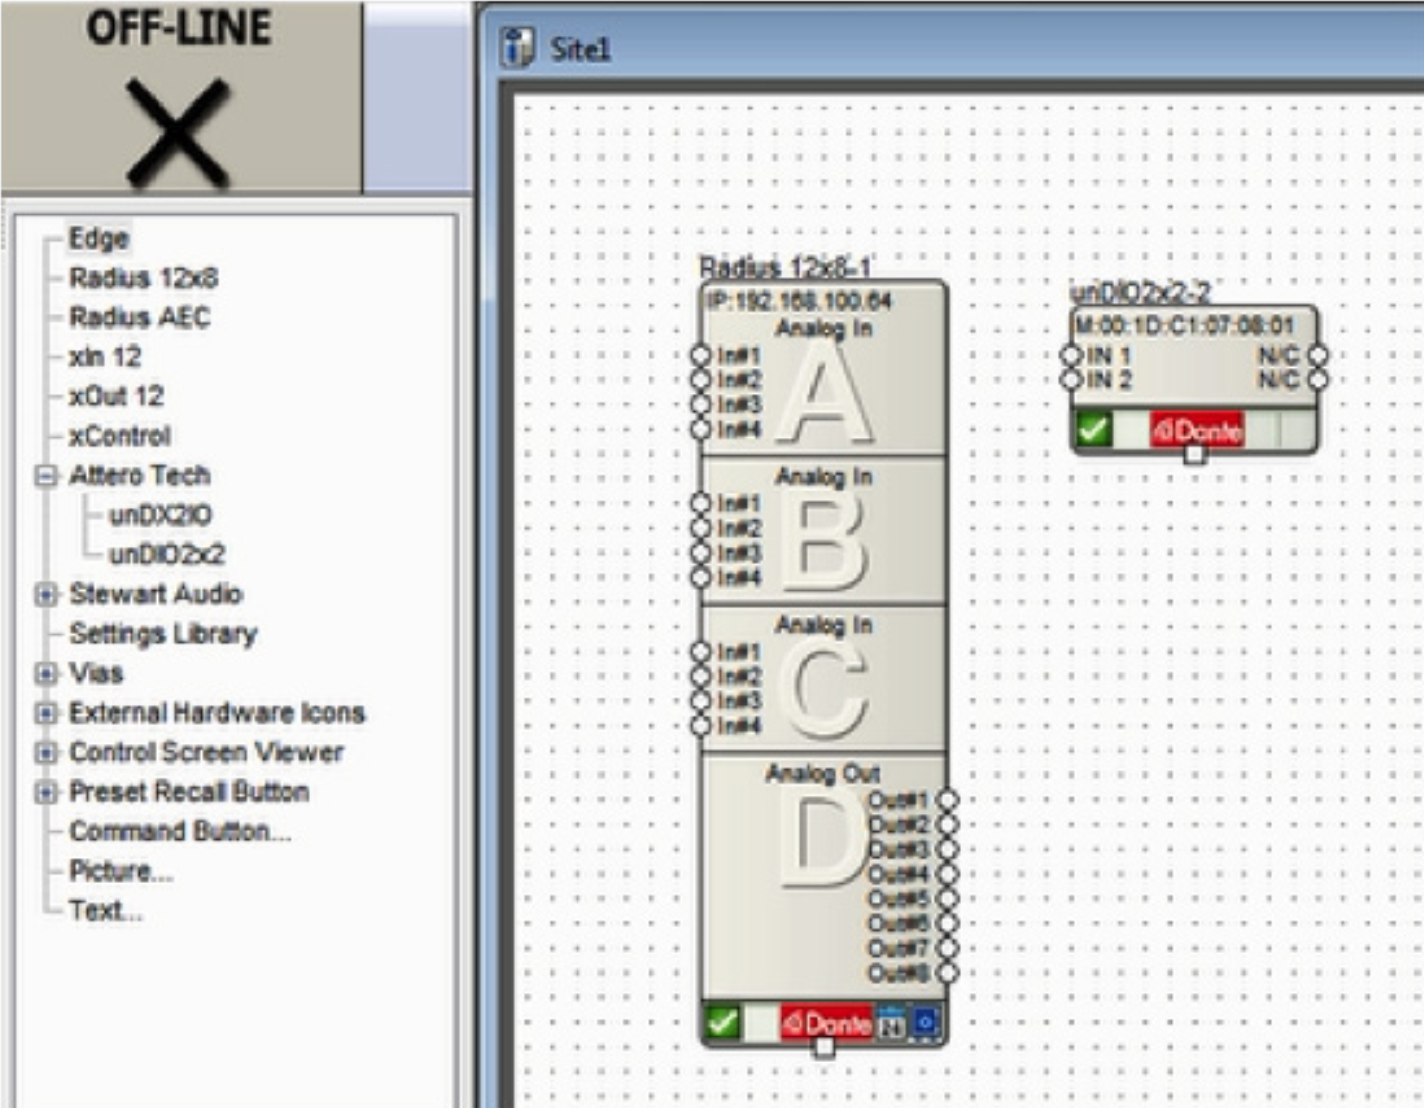
9) A green check will indicate if the unit is connected successfully.
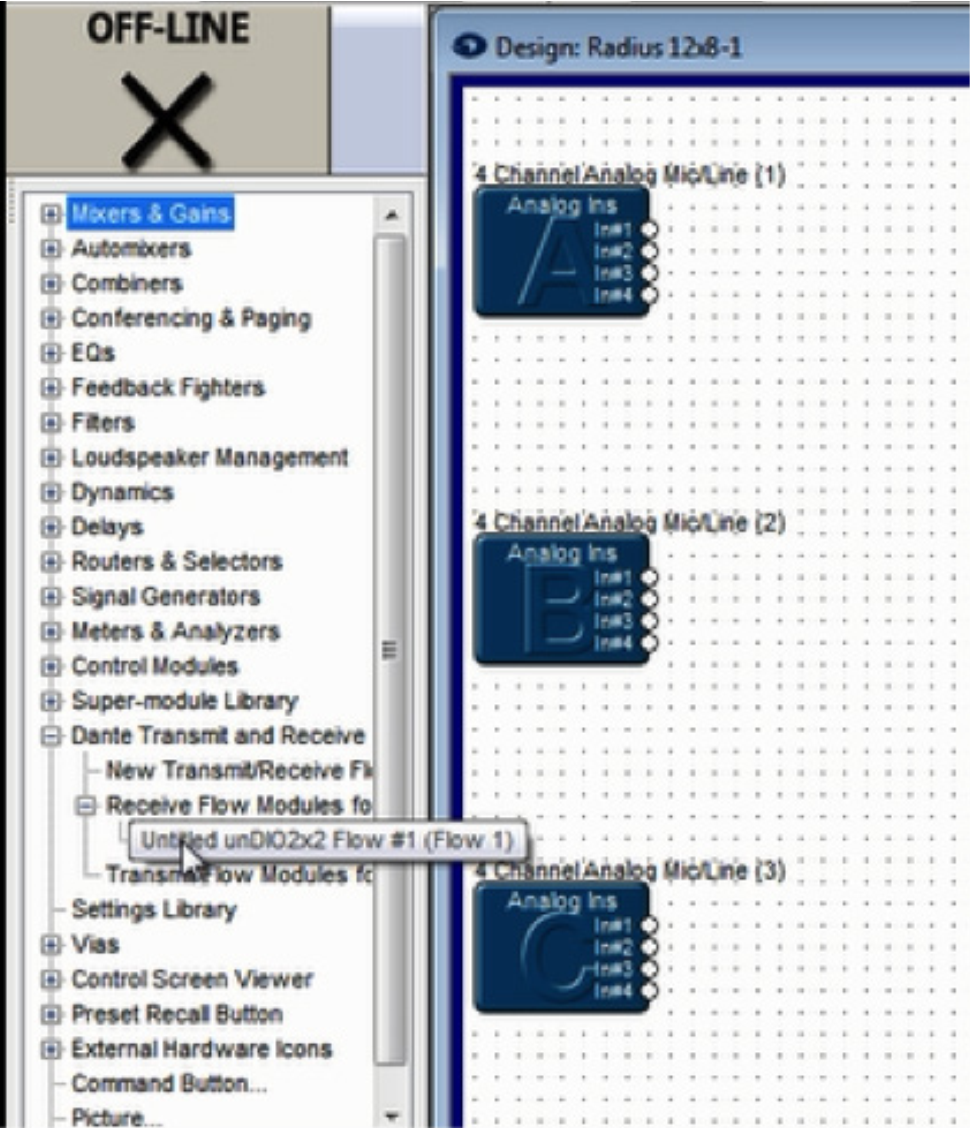
10 ) To receive audio from the Attero Tech endpoint, enter the located DSP’s design by double clicking its unit icon.
11) From the Toolkit under Dante Transmit and Receive Flows, expand the Receive Flow Modules for Existing Flows. Then drag the auto-generated Receive Flow from the Attero Tech unit into the design. The default name of the Flow will include the Attero Tech Dante network name, for example “Untitled unDIO2x2 Flow #1”. This is where the incoming audio from the Attero Tech will be received.
12) Wire the Receive Flow into the audio signal path as desired.
13) To send audio to the Attero Tech endpoint’s outputs be sure a Dante Transmit Flow already exists in the design, or create a new one.
Note: If a Transmit Flow already exists in the design, skip to step 15.
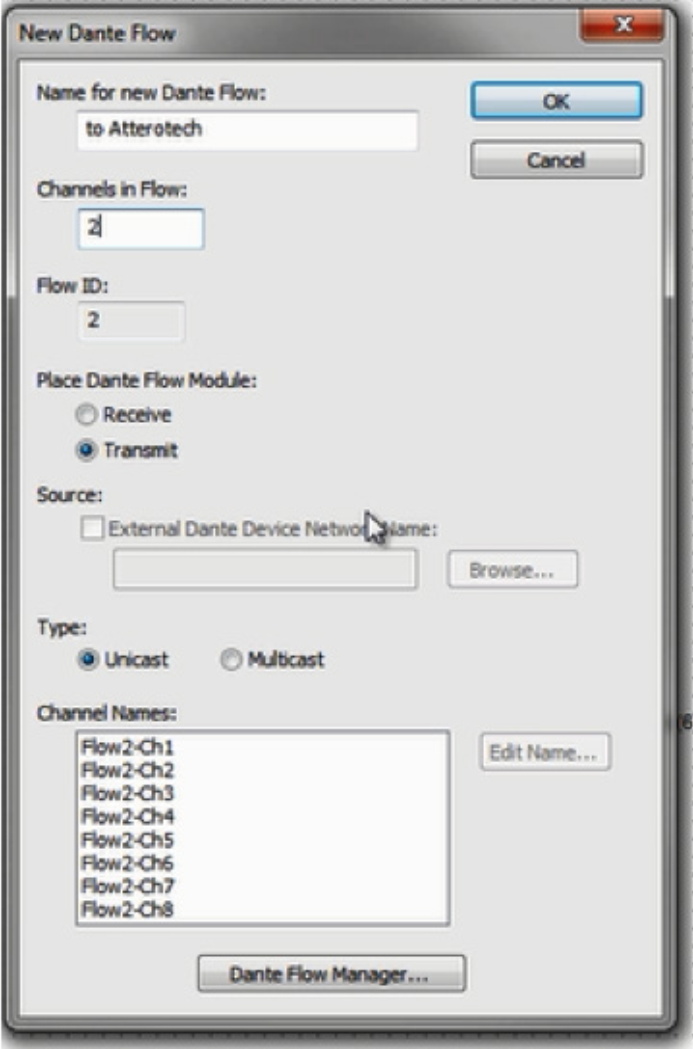
14) To create a new Transmit Flow, from the Toolkit under Dante Transmit and Receive Flows, drag a New Transmit and Receive Flow into the design. In the resulting dialog, name it, set its Channels in Flow to 2, set it to Transmit, label the Channel Names if desired, and click OK.
15) Wire the Transmit Flow into the audio signal path as desired.
16) Close the DSPs Design View to return to the Site View.
17) Double-click on the Attero Tech unit to access its Unit Properties dialog.
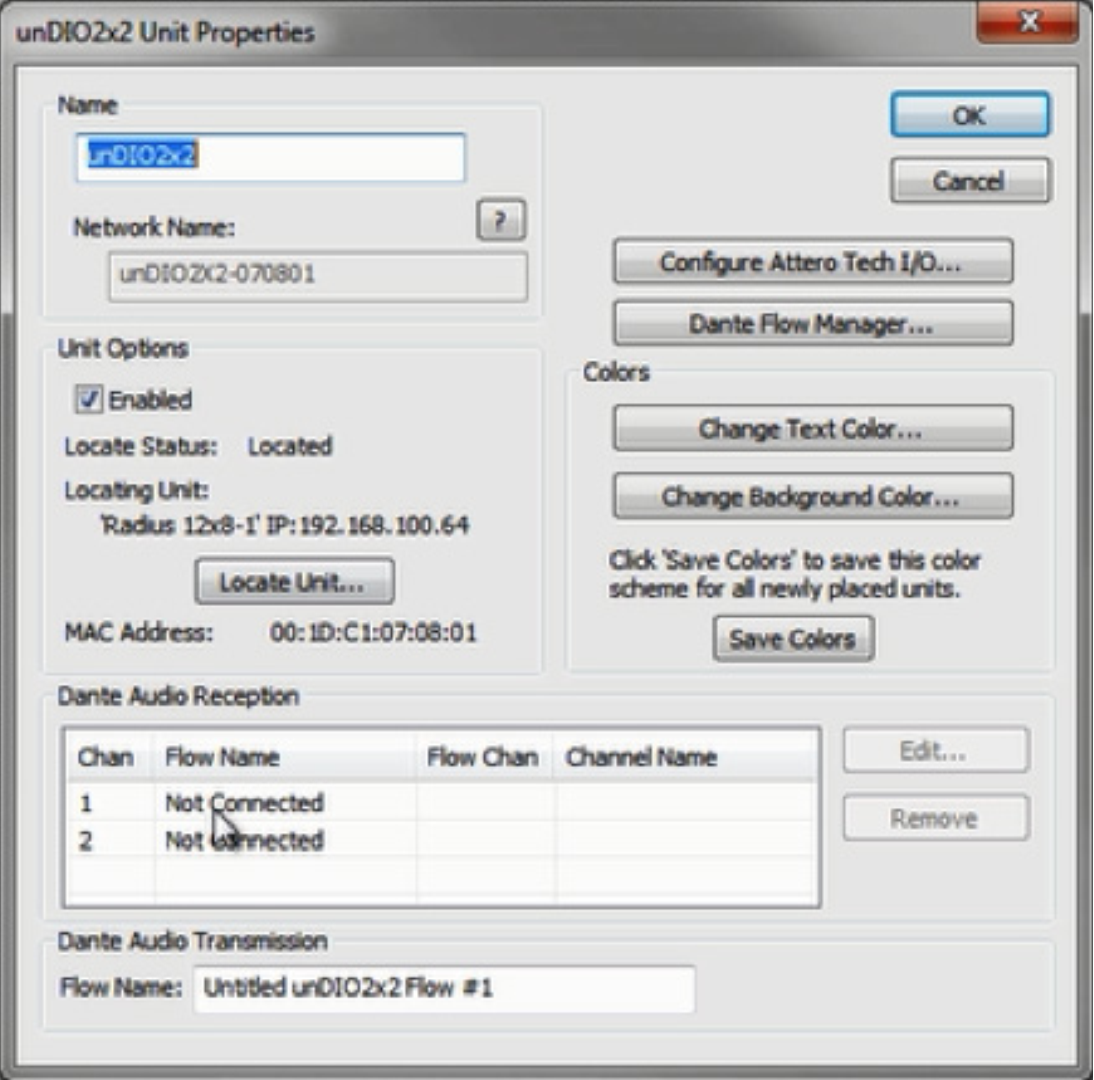
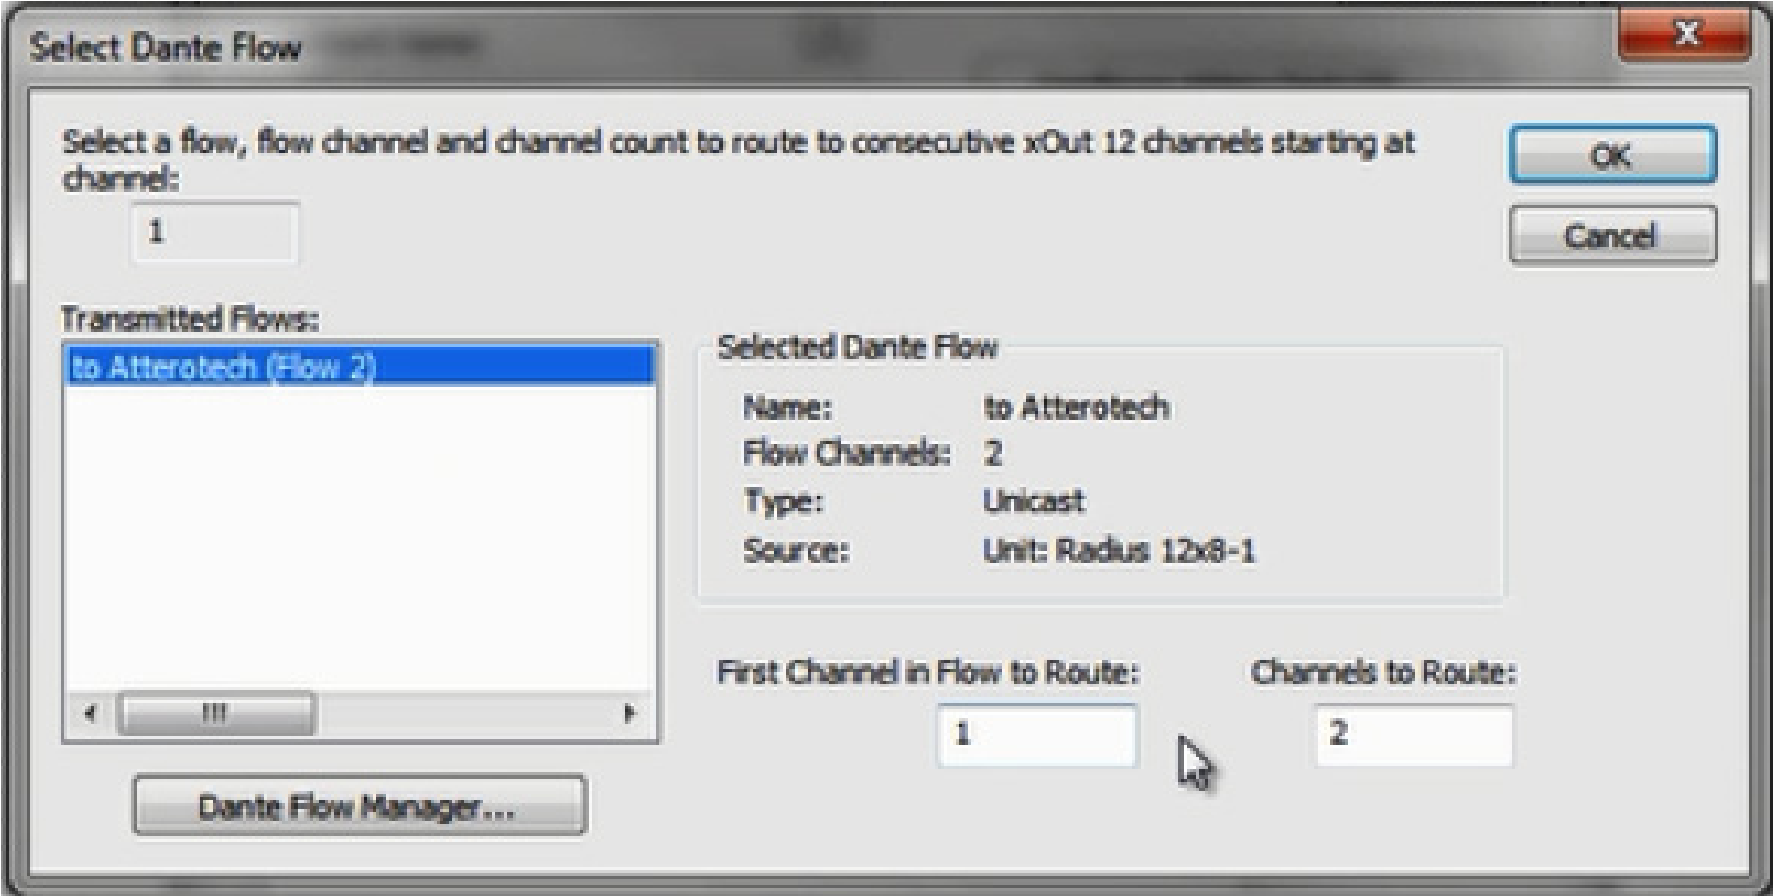
18) Under Dante Channel Reception, double-click on channel 1 or 2. Select the appropriate Dante Flow and the starting channel, typically channel 1, and click OK.
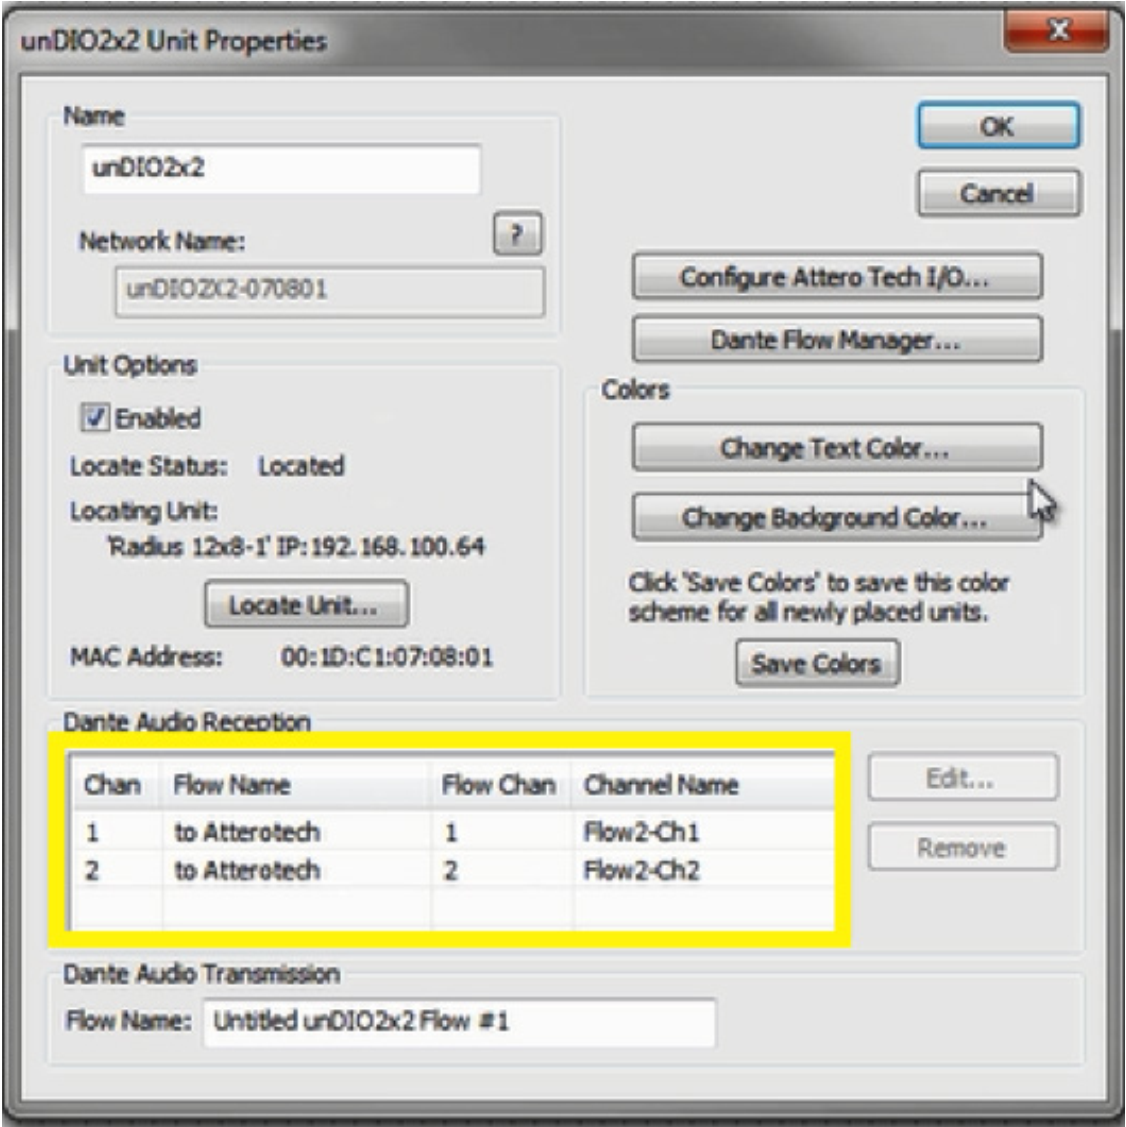
19) The Dante Audio Reception section should now indicate subscriptions to the Transmit Flow’s channels, shown in yellow below:
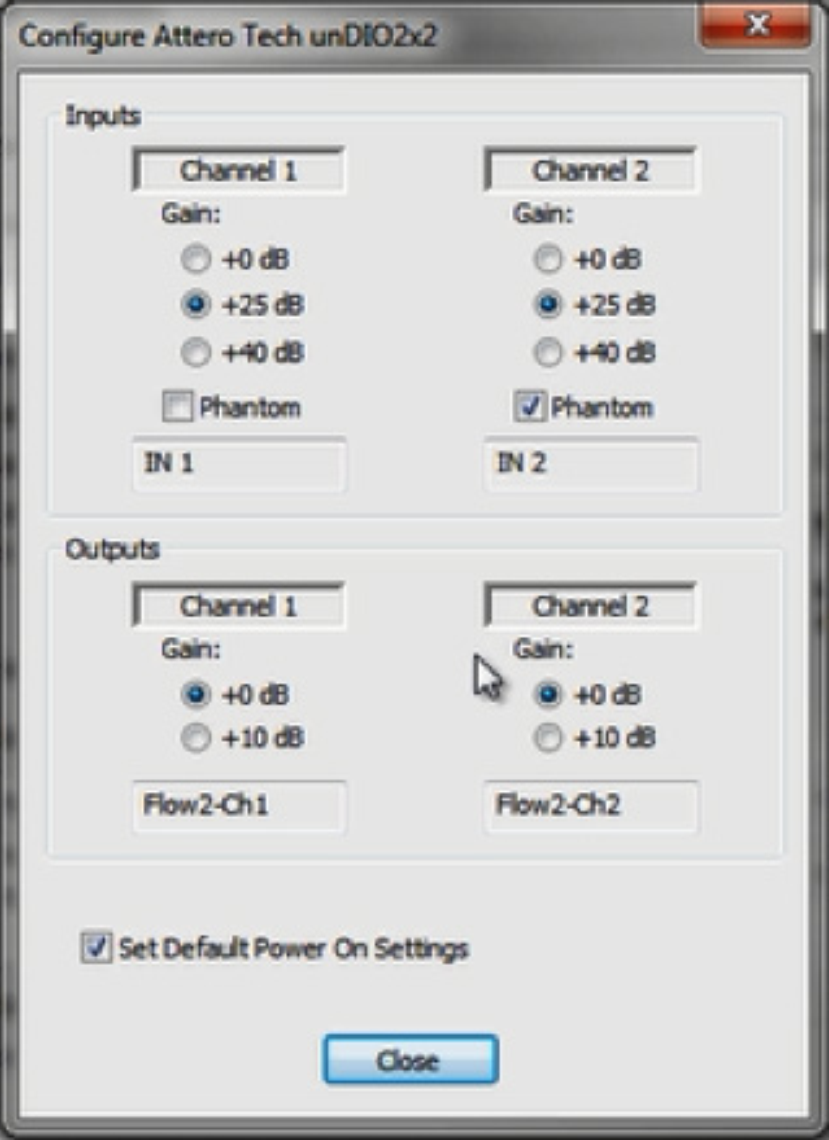
20) Next, click the Configure Attero Tech I/O button and set the inputs and outputs to the desired levels. Be sure the “Set Default Power on Settings” option is checked.
21) Click OK to close the Attero Tech properties screen.
22) Push the Site File. When completed, Dante audio should be passing bi-directionally between the DSP and the Attero Tech endpoint.