


-
Type
- Dante
- Networking
- Control
-
System Management
- Composer Management Software
- SymVue Screen Authoring
- AV-Ops Center Remote Monitoring
- ARC-WEB Control Interface Signal Processing
- D100 AVoIP DSP Server
- Radius NX AVoIP DSP
- Prism AVoIP DSP
- Edge AVoIP DSP
- DSP I/O Expansion Cards
- Jupiter DSP
- Zone Mix 761 DSP I/O Connectivity
- xIO Bluetooth Endpoints
- xIO XLR Endpoints
- xIO AVoIP DSP Audio Expanders Control Systems
- T-Series Touchscreen Controllers
- W-Series Controllers
- Control Server for Personal Devices
- xControl GPIO Expander
- ARC-Series Controllers
Stereo Source Select and Volume Control for Jupiter using ARC-2e and ARC-WEB remotes
Product:ARC-WEB Control Interface
Product:Jupiter DSP
Product:ARC-Series Controllers
Type: Control
ARC remotes are a powerful and intuitive form of control for systems using Symetrix DSPs. This Tech Tip will walk through setting up stereo Source Select and Volume control for the Jupiter on an ARC-WEB for the BGM Zone Mixer app. The process is nearly identical for ARC-2e.
Note: this set up assumes stereo output as well.
Looking at the home page for the BGM Zone Mixer we will be focusing on two major sections.

The Routing Matrix:

And the Priority Mixers:

The channels have already been labeled for this tech tip and we can see that there are two stereo inputs and two stereo outputs; noted as L/R 1, L/R 2, as well as Out L/R 1 and Out L/R 2 respectively.
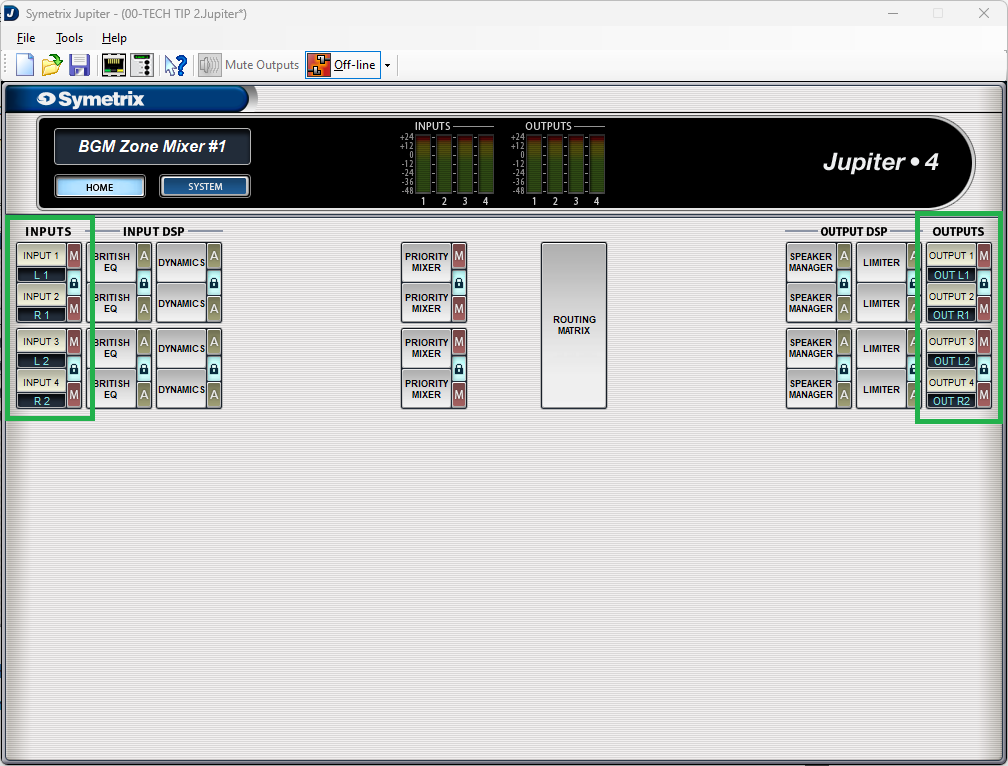
Also notice that all of the “lock” buttons have been engaged, locking channels 1 and 2, and 3 and 4. This is key to getting the proper control for stereo source select and volume control.
Open up Priority Mixer 1. Notice that the title of this page says “Priority Mixer 1/2”. This is noting that Priority Mixers 1 and 2 are linked, so actions in one affect the other.
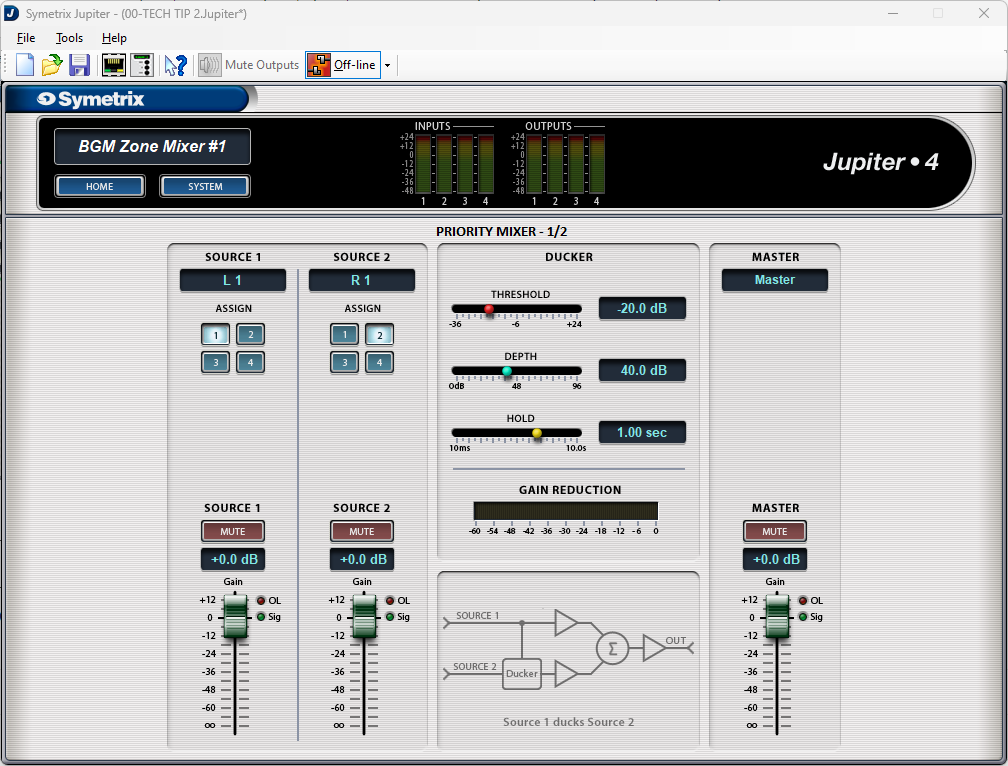
Note that Source 1 assign button has input 1 (L1) selected and its fader is at 0dB (we won’t be focusing on Source 2 in this Tech Tip). Now open up Priority Mixer 2.

We see that it has the same page name, Priority Mixer 1/2, and that the fader position is the same at 0dB, but the assign button is set to input 2 (R1). This represents that Priority Mixer 1 has input 1 (left) selected and Priority Mixer 2 has input 2 (right) selected. Change the assign button to input 4 and move the fader to the Off position. Now go back and look at Priority Mixer 1.

We see that the assign button has changed to input 3 (L2) and the fader has moved from 0dB down to the off position. This is what linking the two channels does.
Note: Odd number priority mixers should only select odd numbered assign buttons, while even numbered priority mixers should only select even numbered assign buttons. Reversing these will technically work, but the other locked priority mixer will do the opposite. For example, if priority mixer 1 selected input 2, then priority mixer 2 would select input 1.
Now that we have an understanding of how the source selection works within the priority mixers, go back to the home page and open the Routing Matrix.
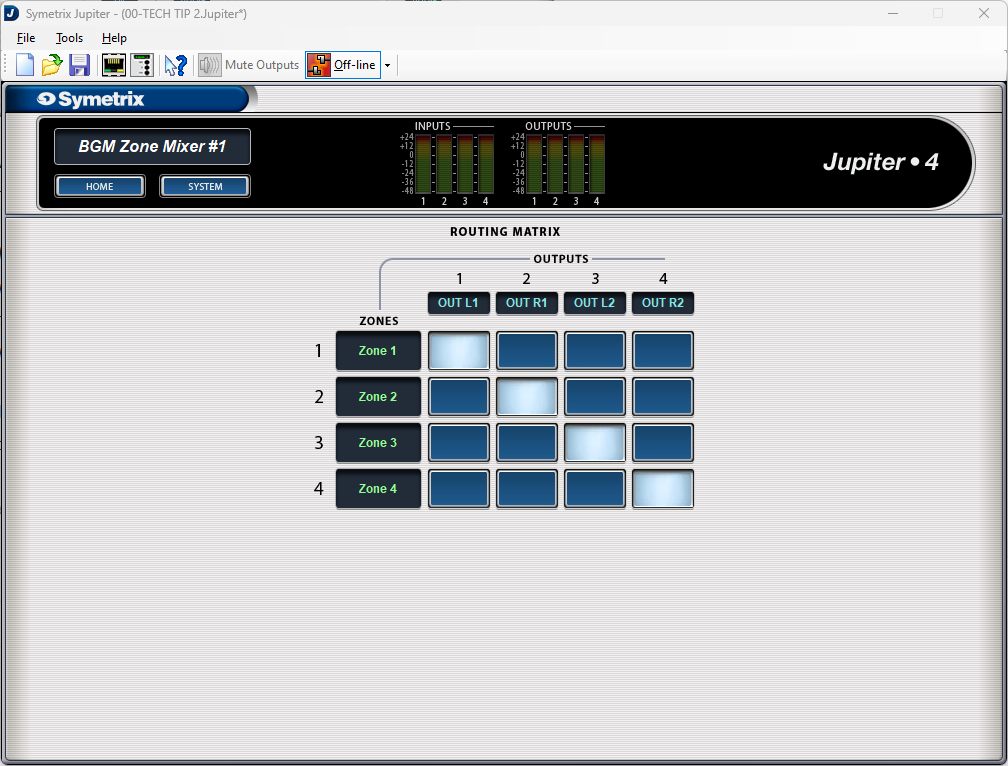
Notice that there are Zones labeled that connect to outputs through cross-points. These zones relate directly to the priority mixers; zone 1 is priority mixer 1, zone 2 is priority mixer 2, and so on. With the stair-step pattern of the cross-points, we can then say that Priority Mixer 1 is Zone 1 which is Output 1. The same for Priority Mixer 2, Zone 2, and Output 2, and the rest. For ease, you are welcome to relabel the zones to Priority 1, 2, and so on.
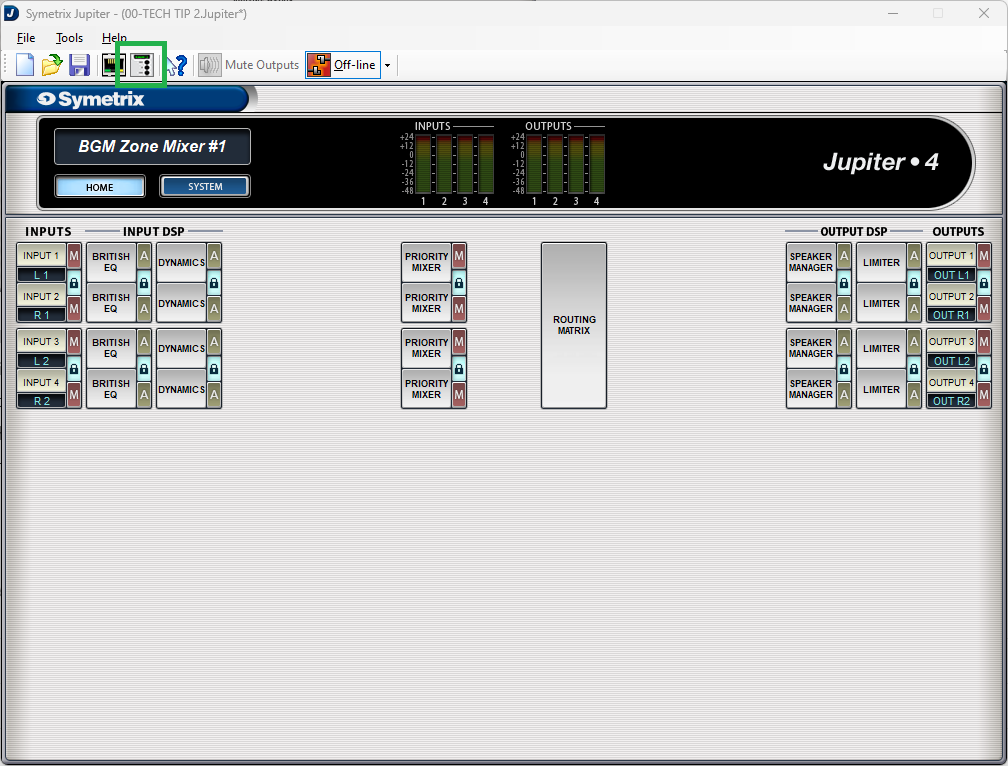
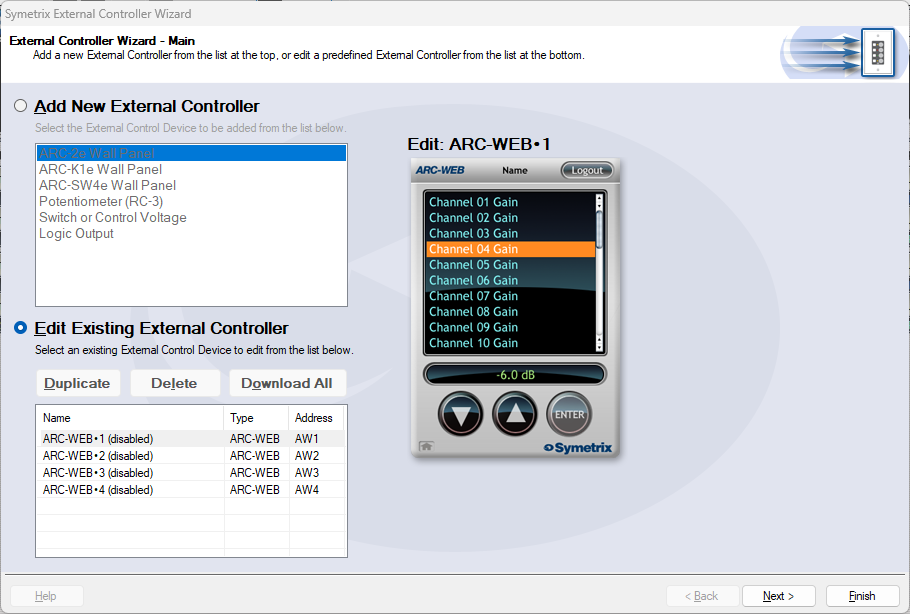
Now let’s set up the source select control. Go back to the home page and open up the External Controller Wizard.
Select Edit Existing Controller, highlight an available ARC-WEB and click Next.
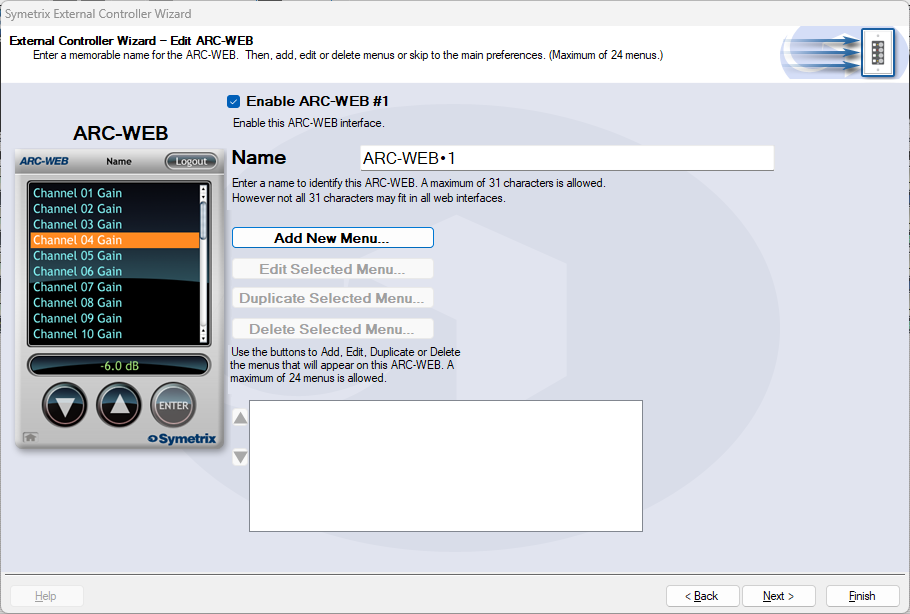
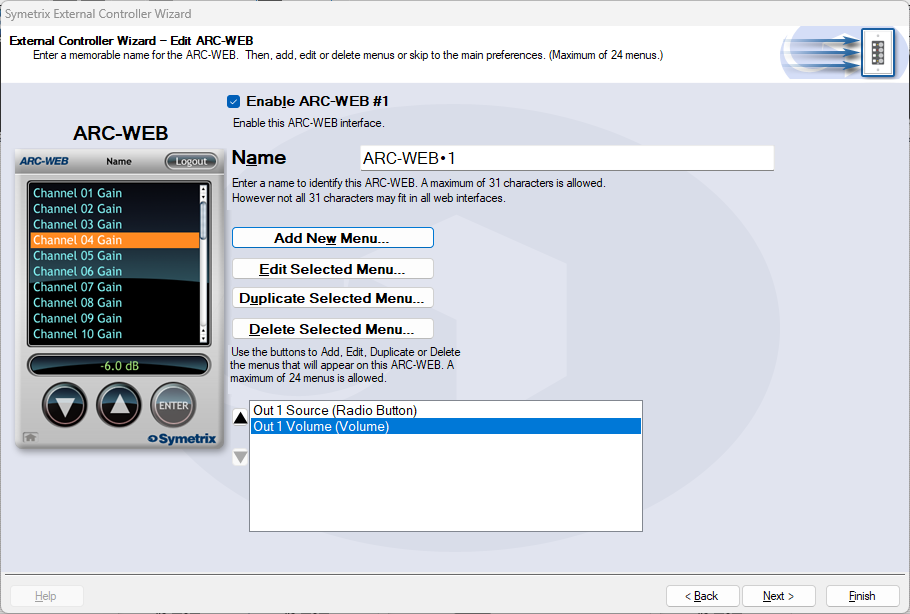
Enable the ARC-WEB at the top, rename the menu if necessary, and click Add Menu.
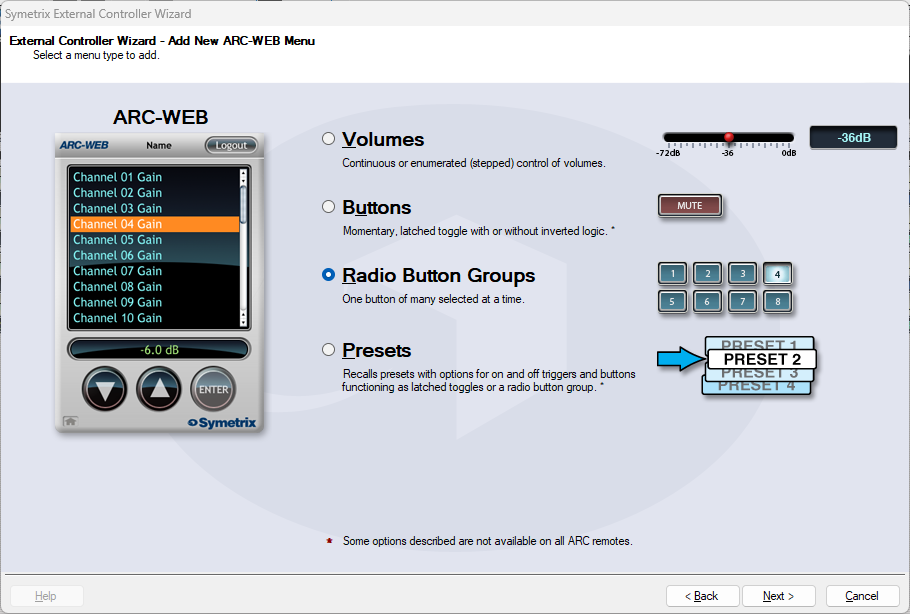
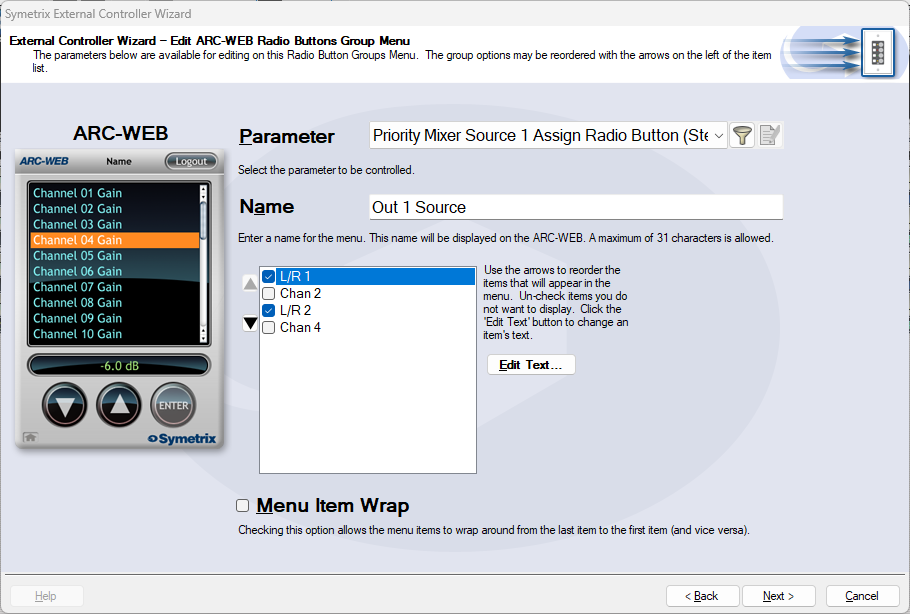
Select Radio Button Groups and click next.
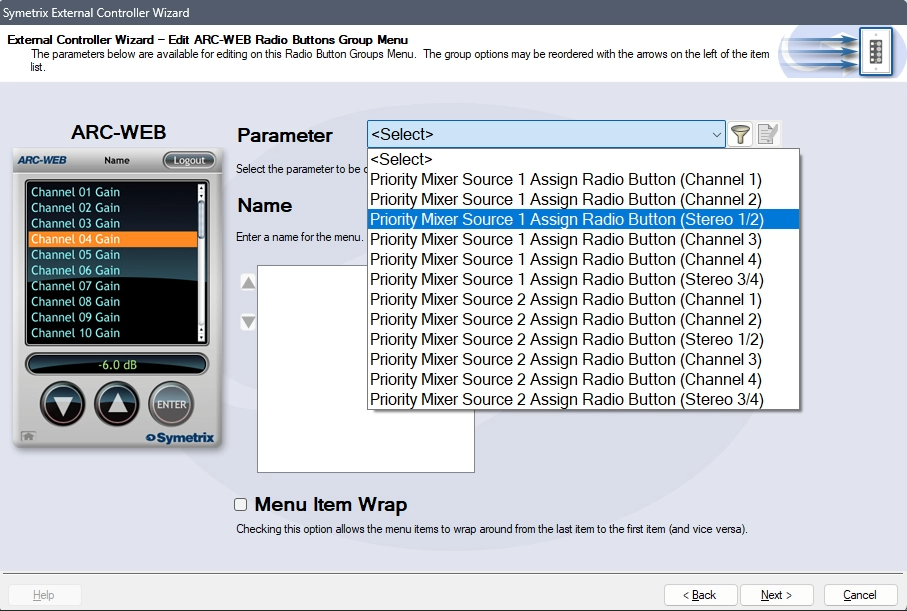
In the Parameter drop-down, select Priority Mixer Source 1 Assign Radio Button (Stereo 1/2). This will tell the Jupiter software that the source select will act in unison between Priority Mixers 1 and 2.
Name the menu appropriately. Remove options 2 and 4 from the channel list. This will prevent someone from accidentally reversing some inputs. In effect, there wouldn’t likely be a critical failure if this happened, however it is redundant and unnecessary to allow the Left audio channel to be in the Right output channel, and vice versa.
Re-name Chan 1 and 3 appropriately. In this case we’ll just use L/R 1 and L/R 2, but this could be a bluetooth source, third-party media player, or other stereo source. Since the Priority Mixers are acting together, Chan 2 and 4 are not necessary. Then click next.
We are brought back to the menu home page. Click Add New Menu to add a Volume Control. This time, choose volumes and click next.

Select Continuous or Enumerated appropriately and click next.
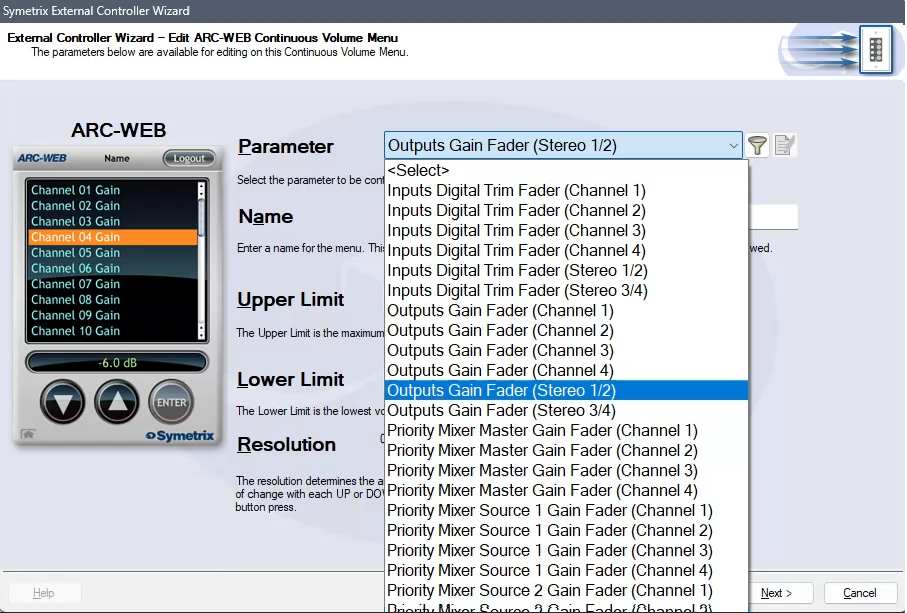
In the Parameter drop-down, select Outputs Gain Fader (Stereo 1/2). This will control the two gain faders for analog Outputs 1 and 2.
Note: While this is not the recommended parameter to control zone volume (as it is post-limiter and can put the sound system at risk of being overdriven with signal), there is not currently a way to control the faders from two Priority Mixers with ARC-WEB or ARC-2e by selecting one of them above. Consider setting the upper limit to the output fader control to prevent the overdriving of the amps/speakers downstream.
Name the menu and set the limit parameters appropriately and click next.

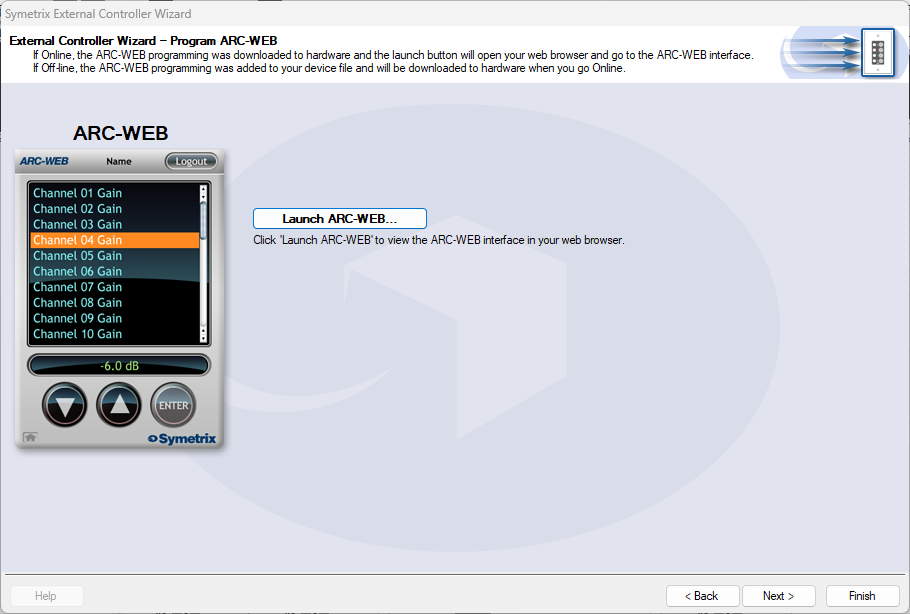
We are again brought back to the menu home page with two menus listed for source and volume control. Now we can test our work by clicking next and setting parameters along the way, until we arrive at the page that allows us to Launch ARC-WEB.
Click launch and a Browser window should open with your ARC-WEB where you can test the source selection and volume control. You must be online with the Jupiter DSP to test this programming. Programming for ARC-2e will allow for a simulator interface that can be tested with.