









-
Type
- Dante
- Networking
- Control
-
System Management
- Composer Management Software
- SymVue Screen Authoring
- AV-Ops Center Remote Monitoring
- ARC-WEB Control Interface Signal Processing
- D100 AVoIP DSP Server
- Radius NX AVoIP DSP
- Prism AVoIP DSP
- Edge AVoIP DSP
- DSP I/O Expansion Cards
- Jupiter DSP
- Zone Mix 761 DSP I/O Connectivity
- xIO Bluetooth Endpoints
- xIO XLR Endpoints
- xIO AVoIP DSP Audio Expanders Control Systems
- T-Series Touchscreen Controllers
- W-Series Controllers
- Control Server
- xControl GPIO Expander
- ARC-Series Controllers
-
Type
- Dante
- Networking
- Control
-
System Management
- Composer Management Software
- SymVue Screen Authoring
- AV-Ops Center Remote Monitoring
- ARC-WEB Control Interface Signal Processing
- D100 AVoIP DSP Server
- Radius NX AVoIP DSP
- Prism AVoIP DSP
- Edge AVoIP DSP
- DSP I/O Expansion Cards
- Jupiter DSP
- Zone Mix 761 DSP I/O Connectivity
- xIO Bluetooth Endpoints
- xIO XLR Endpoints
- xIO AVoIP DSP Audio Expanders Control Systems
- T-Series Touchscreen Controllers
- W-Series Controllers
- Control Server
- xControl GPIO Expander
- ARC-Series Controllers
D100 AVoIP DSP Server Tech Tips
The purpose of this Tech Tip is to provide information and instruction on using AES67 with Symetrix Dante-enabled DSPs. The AES67 standard provides interoperability between different forms of AoIP (Audio over IP). AES67 is not a networking solution in and of itself, but rather a group of interoperability specifications for connecting media streams. AES67 is supported by various IP-based audio networking systems such as Dante, Ravenna, Livewire and Q-LAN.
Because Dante supports AES67, this allows Symetrix Dante-enabled DSPs to receive and transmit audio with other IP-based audio networking systems, Q-LAN as an example. When using Symetrix Dante enabled DSPs with AES67, there a few key points to keep in mind:
- Symetrix Dante-enabled DSPs are compatible with AES67, but are not AES67 specific hardware.
- AES67 stream assignments are handled by the receiving device
- AES67 streams will only appear as a transmitter in Dante Controller.
- AES67 transmit streams from a Symetrix Dante-enabled DSP will NOT be assignable in Dante controller.
- Here is a link to set up AES67 receive flows with Q-SYS
- AES67 is capable of unicast and multicast communication, however Dante’s implementation of AES67 currently only supports multicast.
- When two Dante-enabled devices are passing audio between each other they will always use Dante for the communication, regardless of AES67 streams.
- Audinate’s Ultimo chipset does not currently support AES67
- Here is a link to the AES67 standard
AES67 Receive Stream
Here are the instructions for creating AES67 receive buses, using the generic Network Receive Modules (This example uses a Radius AEC and QSC Q-SYS Core 250i)
aes 1
1. From the Toolkit, add a Radius AEC to the Site View page.
aes 2
2. Open the Design View page by double-clicking the Radius AEC.
aes 3
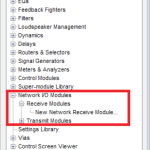
3. From the Toolkit, expand Network I/O Modules, then expand Receive Modules.
aes 4
4. Double-click or drag in a New Network Receive Module.
aes 5
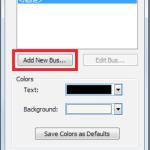
5. The Network Receive Module Properties window will open automatically. Click the button to “Add New Bus.”
aes 6
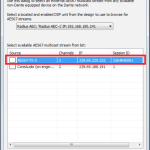
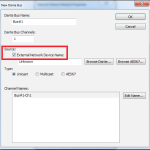
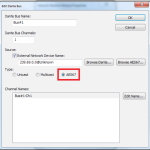
6. Change the type to AES67.
aes 7
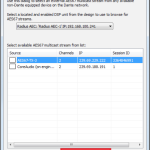
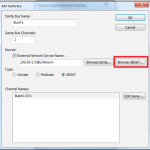
7. Click the “Browse AES67” button.
aes 8
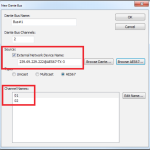
8. Select the desired AES67 multicast stream from the list.
aes 9
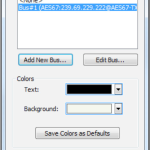
9. Click the “Select AES67 Stream” button.
aes 10
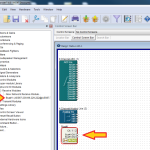
10. The New Bus window is now updated with the AES67 stream information (device network name and channel names).
11. The new AES67 receive bus is available in the Network Receive module Properties window.
12. Click Ok. The new receive bus has now been created.13. Push the site file and Composer will make the AES67 to Dante subscriptions.
13. Push the site file and Composer will make the AES67 to Dante subscriptions.
AES67 Transmit Stream
Here are the steps to create AES67 transmit streams:
aes 11
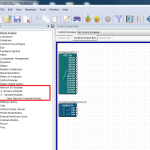
1. Open the site file to the Design View page.
aes 12
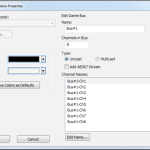
2. From the Toolkit, expand Network I/O Modules, then expand Transmit Modules.
aes 13
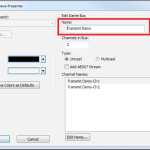
3. Add a New Network Transmit Module. The Network Transmit Module Properties window will open.
aes 14
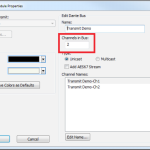
4. Edit the name of the transmit bus. Note: Naming of transmit buses is very important for organization.
aes 15
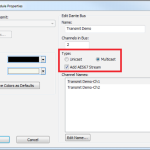
5. Select the number of channels in the transmit stream.
aes 16
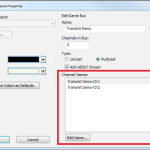
6. Select the transmit bus type.
7. Name the individual transmit channels.
8. Click OK and the transmit bus will be added to the site file.
6. Select the transmit bus type.
7. Name the individual transmit channels.
8. Click OK and the transmit bus will be added to the site file.
This is a general-purpose step-by-step guide for connecting to Symetrix digital signal processors and related hardware with a PC.
Please note that Symetrix only recommends using Windows 10 and above. Other operating systems are not officially supported at this time.
See the bottom of this article for information on unsupported equipment and software.
Step 1 – Install the right software for the device
Symetrix design software is used to connect to Symetrix devices and is available to download, install, and run for free. The required software will depend on the devices that needs to be accessed:
COMPOSER PLATFORM:
Software can be downloaded here under the Composer tab.
- D100
- Radius and Radius NX series
- Prism series
- Edge
- Solus NX (note "NX", original Solus are not supported).
- T-Series touch panels
- W-Series wall remotes
- Control Server
- xControl
- xIO Bluetooth
- xIO XLR
- xIn / xOut 4 and 12
- xIO 4x4
- xIO Stage 4x4
Important: To avoid errors when going online with the hardware, please download the version of Composer that matches the DSP’s firmware revision number as closely as possible. This number can be found by cycling through the system pages on the front LCD panel of the DSP.
FIXED ARCHITECTURE PLATFORMS:
Software for Symetrix’s current Integrator Series (closed-architecture) DSPs can be downloaded here under the Jupiter and Zone Mix tabs. These include:
- Jupiter
- Zone Mix 761
Step 2 – Make sure the PC is on the right network
Once the correct software has been downloaded, the next step is to connect the PC to the device’s control network. If a DSP is Dante-enabled, make sure not to confuse the Dante port for the "control"/"ethernet" port. Configuration of these devices through the Symetrix software is always done through the control port.
By default, Symetrix devices are programmed to resolve an IP address automatically, either from a DHCP server or link-local (169.254.x.x) if there is no DHCP server found. Any devices with a front display will indicate their IP address on the front LCD panel. Some devices (T-Series and W-Series) may not show this information if they have been programmed. Cycling through the system pages on the front display of a Composer-based DSP will also display the subnet mask. If a device has previously been configured with a static IP address, it can be reset to DHCP by briefly pressing the device’s reset button, which is usually recessed in the housing on the back of the device.
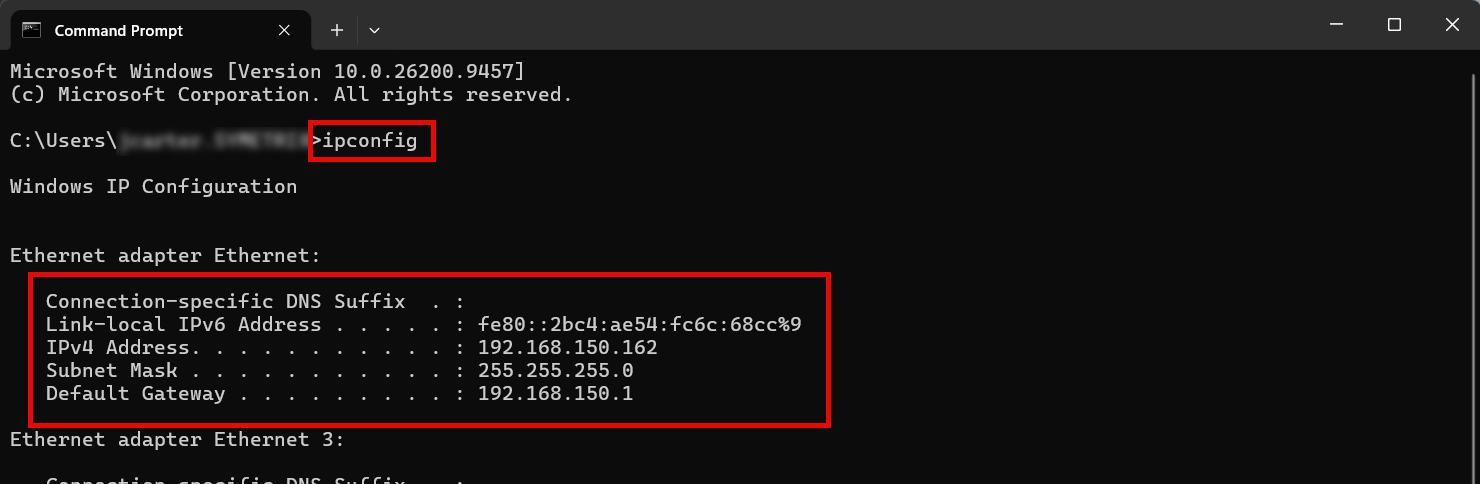
Check your PC's network configuration by opening the Windows Command Prompt and entering "ipconfig". The relevant adapter's information will be shown along with any others available.
Important: Ensure that both the IP address scheme and subnet mask of the PC match that of the DSP. If setting the PC to a static IP address, it must be a different/unused IP address on the network. If connected directly to a DSP that has a known static IP address, setting the PC to any available IP address will work. If connected directly to a DSP that does not have a static IP address, the PC does not need to have a static link local IP address.
Step 3 – Locate the Symetrix hardware on the network and Pull
Once the PC is on the correct network, open the appropriate Symetrix software. The next steps will depend on the software being used.
COMPOSER:
Composer platform devices will show their location status via an indicator on the hardware module itself.
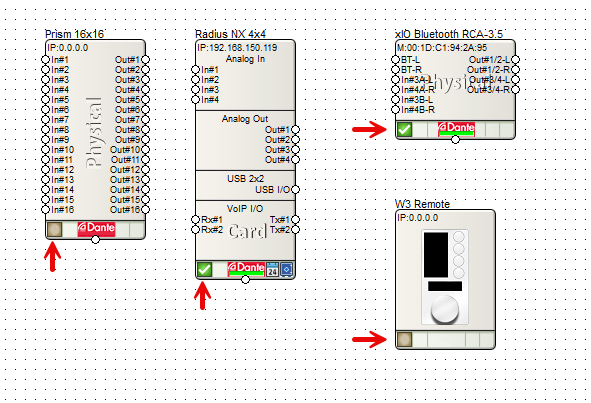
- Devices are located when there is a green check-mark in the location status indicator box.
- If this is empty, the device is not located.
- If the check-mark is yellow, the device is located and its outputs may be muted for some reason.
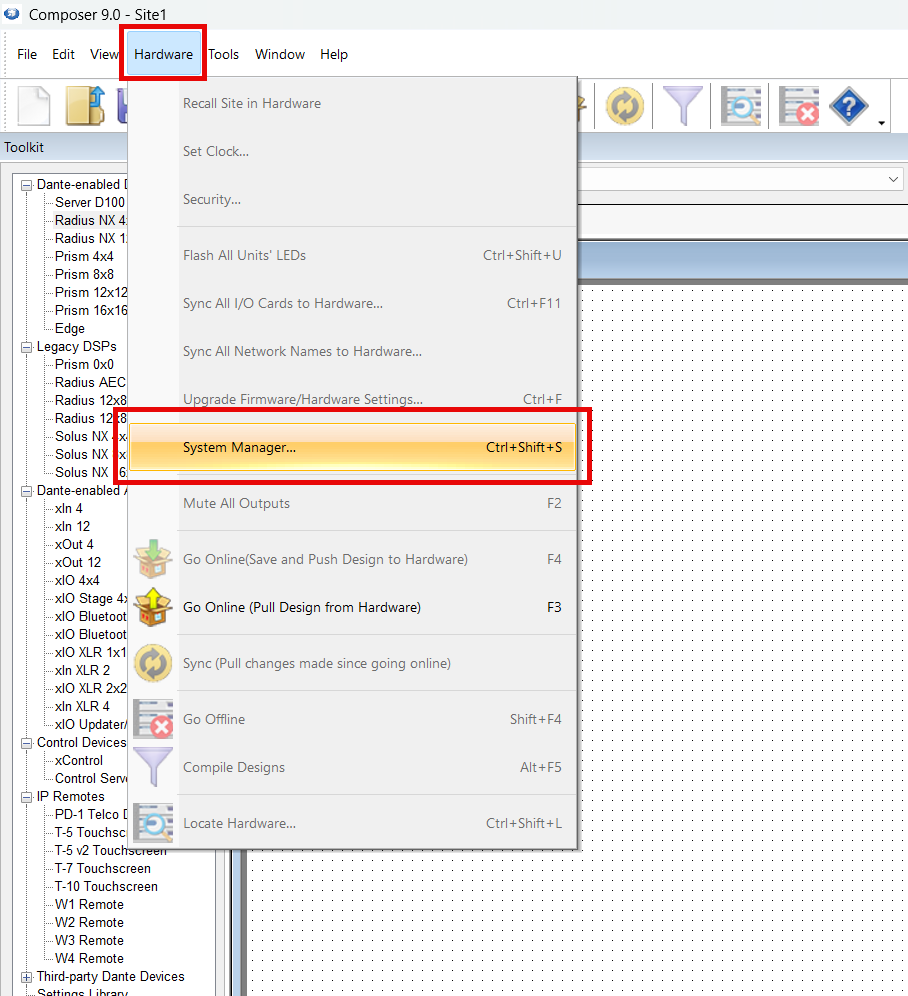
Go to Hardware > System Manager from a blank/new Composer site file to search the network for available hardware.
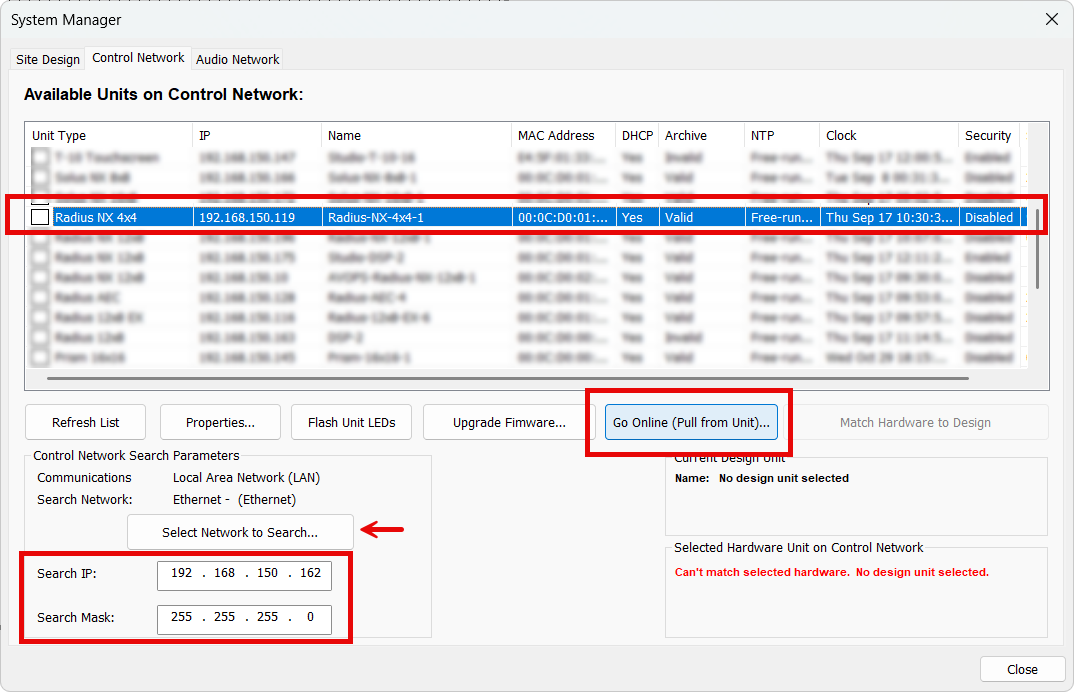
In the Hardware or Control Network tab (depending on the version of Composer) find the appropriate DSP, highlight it, and select Go Online (Pull from Unit).
Note: ensure Composer is using the correct NIC to search the network.
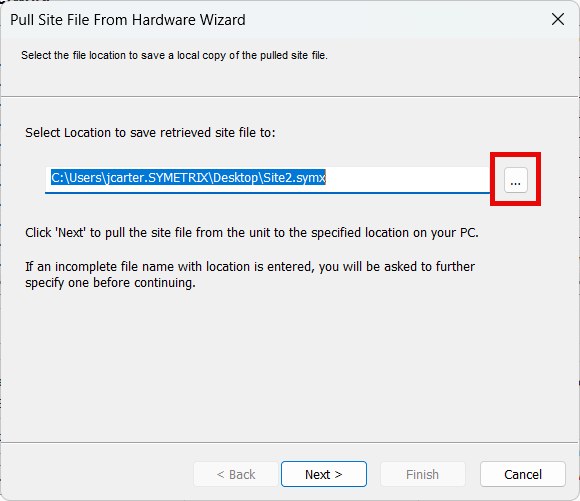
Confirm the file name and save location for the site file - Desktop is a good location, but anywhere that OneDrive or other cloud services don't access is recommended for later permissions and access reasons.
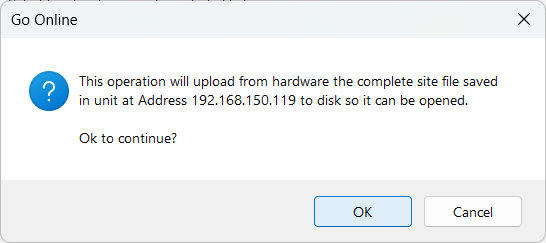
Confirm the prompt that the site file will be pulled from the unit at the given IP address.
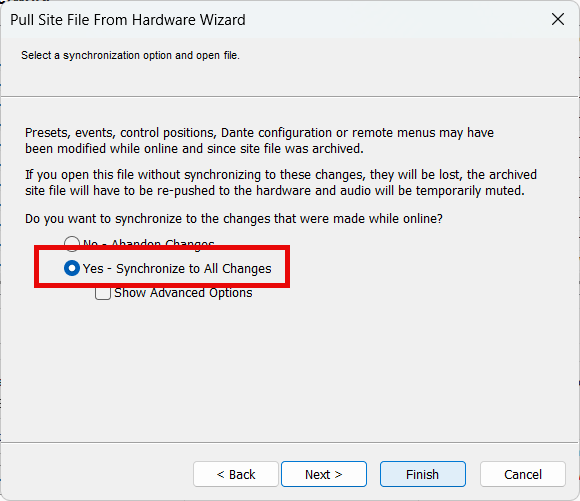
In the large majority of cases, synchronizing the site file on pull is the advisable option. This will pull the current running configuration of all volumes, mutes, routing, etc. - what's running live right now.
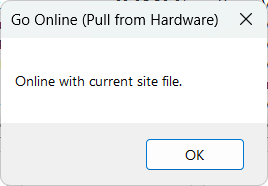
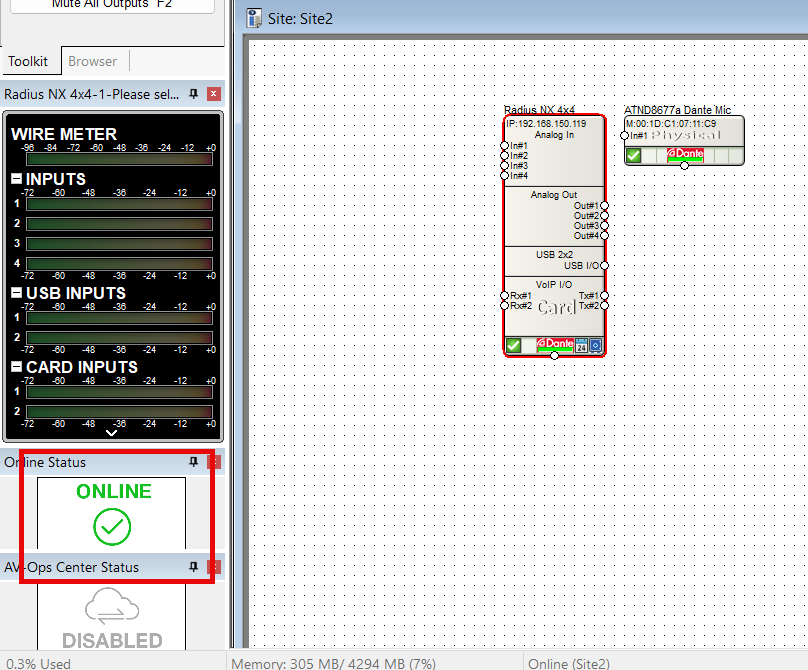
On completion, Composer will notify of Online status with both a dialog and the Online status indicator in the left panel.
FIXED ARCHITECTURE PLATFORMS:
Fixed architecture platforms (Jupiter and Zone Mix 761) will use their own software respectively and have a Connection Wizard to complete location and go online.
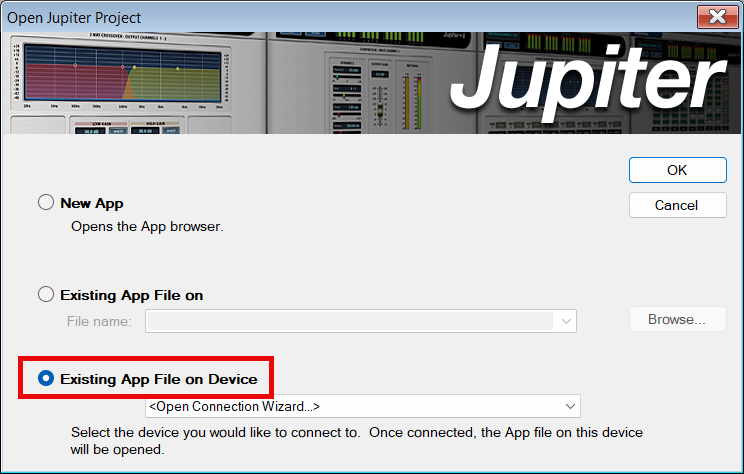
When initially opening the software and connecting to a device select Existing App File on Device to initiate the Pulling process of location and going online.
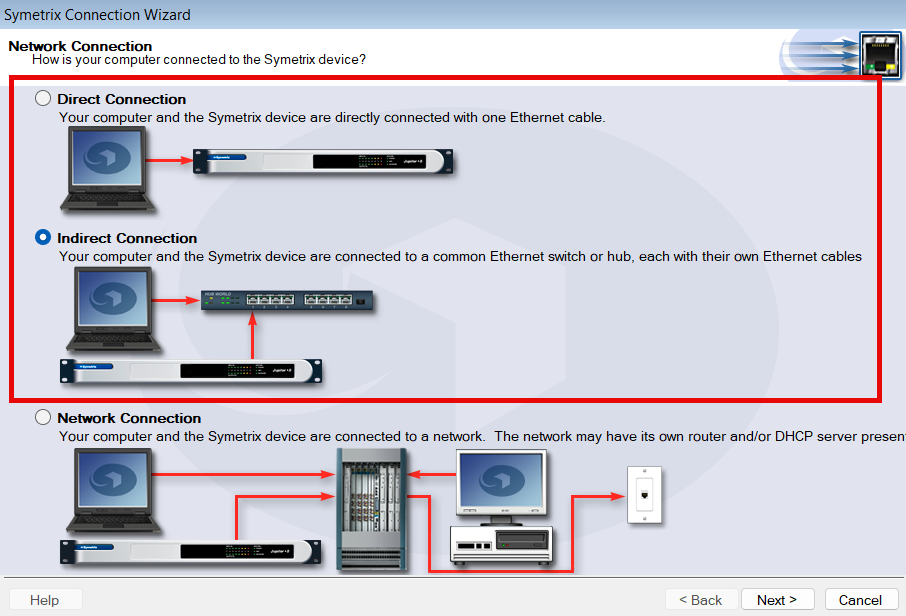
Depending on the connection, select either Direct or Indirect.
- Use Direct if connecting the PC directly cabled to the DSP.
- Use Indirect if using a switch or small network of switches.
- Network is the least common choice and is usually meant for larger networks that involve routing/gateway or subnet jumps (unrecommended).
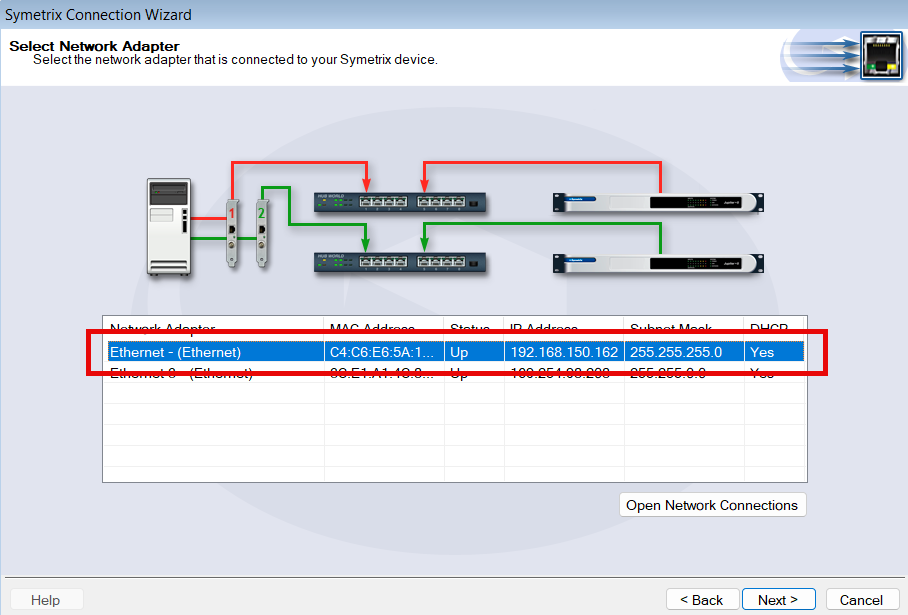
Select the appropriate PC NIC for the connection, if there are multiple available. Wifi should never be used to connect to Symetrix DSPs - always cable to the network or the DSP directly.
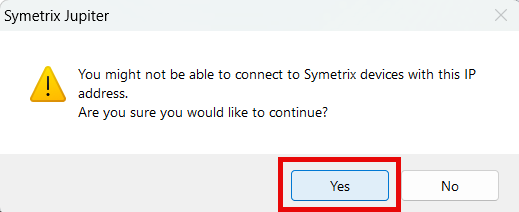
Once a network is selected, the software may warn that it may not be able to connect. This is fairly common and can be clicked Yes through to continue.
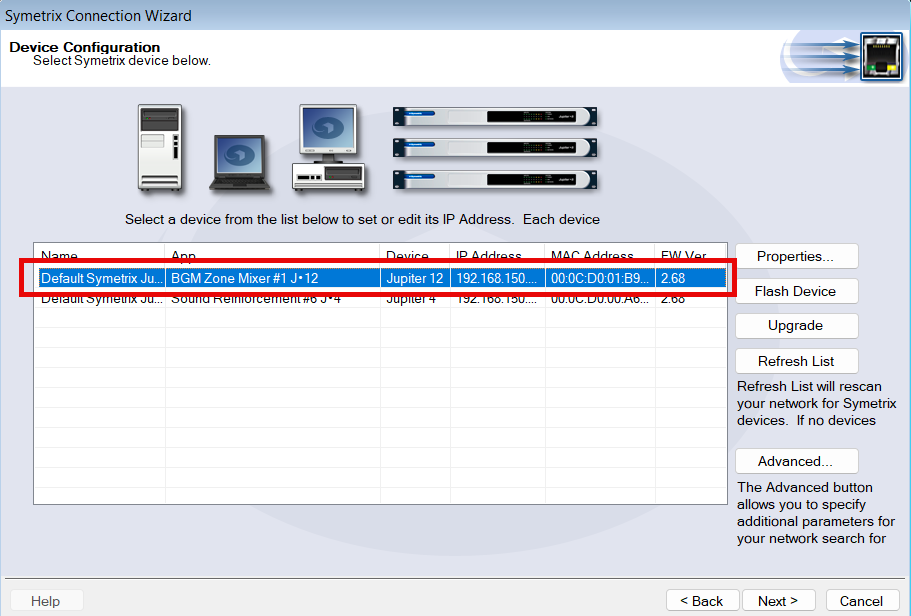
If the PC/software can see the given DSPs on the network, they will be shown here. Select the appropriate one and click Next.
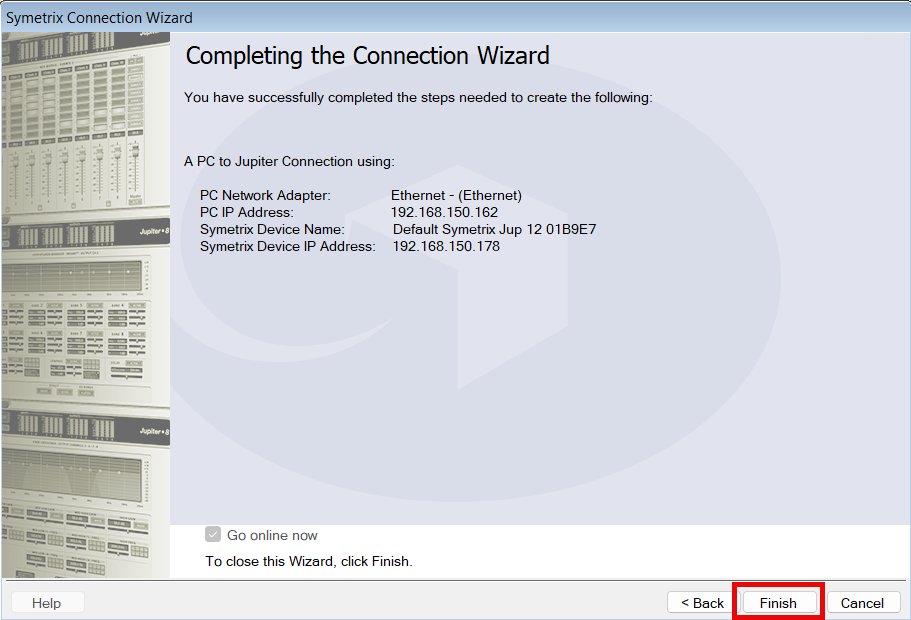
Finalize the Go Online process and the software will attempt to pull the programming and go live.
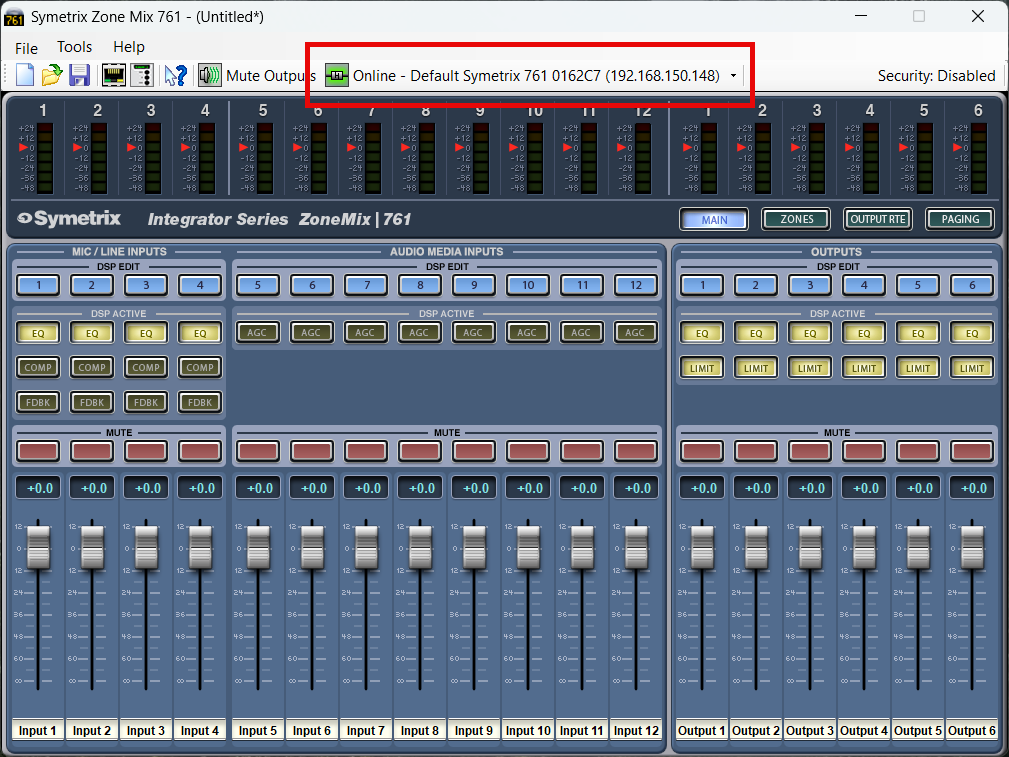
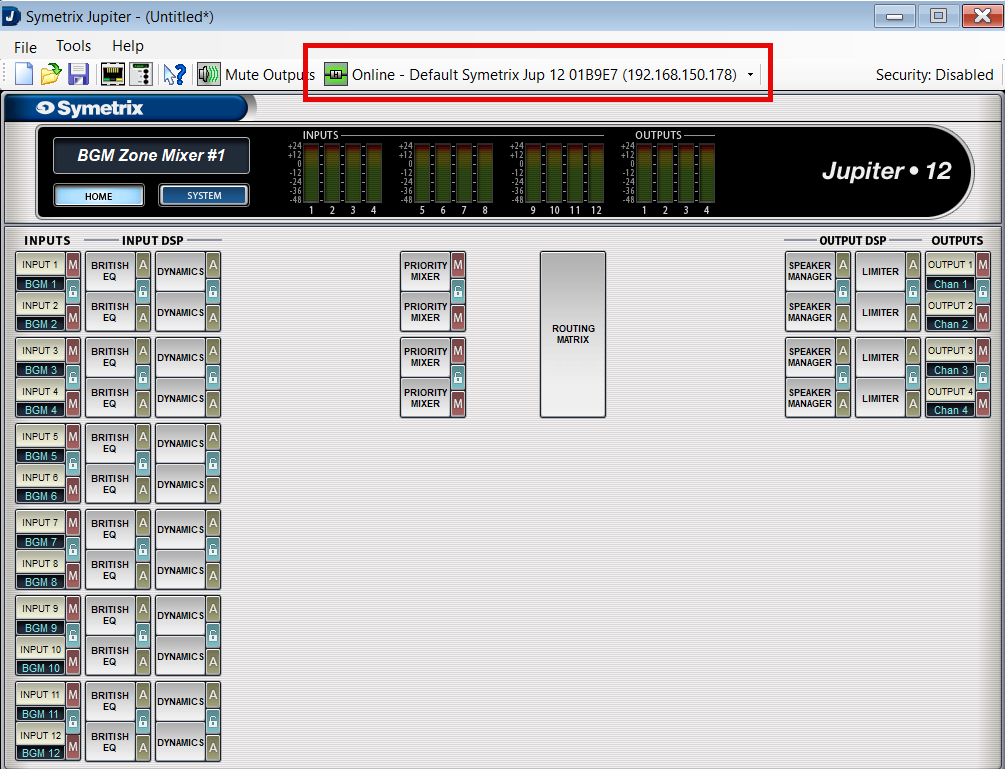
Depending on the software, the main GUI will appear and the "Online" indicator will be present.
Troubleshooting
If you have followed the above steps and are having difficulty locating any devices on the network, we have a location troubleshooting guide available here.
If you are able to locate devices, but are receiving warnings from the software about failures to go online:
- Disable Windows Defender Firewall and any third-party antivirus/firewall programs that may be blocking network traffic.
- Double check that the device firmware versions for all devices in the site file match the version of Composer being used (the first two numbers are most important).
- Power cycle both the PC and the device(s).
- If the device is connected to the PC through a network switch, try connecting directly instead.
- If a (Composer) device cannot be located and is not currently needed in the site file, right click it and select ‘Disable Unit’, then Push online (this will cut audio for the duration of the Push).
- If a specific error code is being presented, please contact Technical Support at support@symetrix.co.
UNSUPPORTED EQUIPMENT
As of January 2024, Symetrix no longer supports the Designer platform, nor any equipment/software released before the Composer platform. This includes, but is not limited to:
Designer platform:
- 8x8 DSP
- BreakIn & BreakOut 12
- CobraLink
- Control I/O
- Express series
- Solus series (not NX)
- ARC-2, ARC-SW4, ARC-K1, ARC-SWK, ARC-Mic/XLR (Note these units do not have "e" at the end while current ARC remotes do.)
Legacy platforms:
- 200 series
- 300 series
- 400 series
- 500 series
- 600 series
- Lucid
- AirTools
- Deuce
- AutoMix Matrix
- Zone Mix 760
- Zone Mix 780
Please contact Technical Support for an archived copy of the Designer software. Other resources may be found online via search engine, message board, or others. We also have a couple of authorized third-party service centers familiar with our legacy equipment and may be able to provide further assistance. Please reach out to:
Condor Electronics
10007 Aurora Ave N
Seattle WA 98133
Phone: 206-633-5190
Email: info@condor-electronics.com
Advanced Musical Electronics
8665 Venice Blvd.
West Los Angeles, CA 90034
Phone: 310-559-3157
E-mail: mail@advancedmusical.com
Any resources, materials, costs, or support for discontinued Symetrix equipment are set solely by these service centers and are not dictated by Symetrix. Symetrix highly recommends upgrading installations with unsupported our outdated equipment to current technology. Please talk to your Regional Sales Manager or Dealer, or locate one through our website per your region here.
A Symetrix system’s I/O can be comprised of a combination of hardware, from DSPs such as D100, Edge, Radius NX, or Prism to the I/O expanders such as the xIn12, xOut12, and xControl. Pushing the site file programming from the host PC running Composer Software to the system can take anywhere from a few seconds to a few minutes depending on the amount of hardware that must receive programming.
Often times during commissioning, pushing the file to the system will be performed many times over as changes are made to the signal flow, remote controllers, presets, or parameters, and of which it is desirable to listen to these changes and/or to save these changes permanently in the system. By speeding up the Push process, it is possible to shave many minutes off of the overall commissioning time of the system.
The first thing to note is that all control and routing is truly performed in the DSP units. No processing or control is actually performed in the xIn 12, xOut 12, or the xControl, as once programmed these devices simply send audio or control to the d100, Edge, Radius NX, or Prism.
What this means is that once the xIO have had their programming pushed into them, then changes to the site file signal path, DSP modules, or control will not typically include changes to the xIO devices. As such, disabling them from the Push process will eliminate needlessly reloading the same programming into these devices whose settings/programming is not changing between each subsequent push.
Take this example site file. It includes Edge, Radius NX, xIn 12, xOut 12, and xControl hardware. Before disabling the xIO units from push, first locate all hardware and push the design (F4) to program all hardware, including the xIO devices.
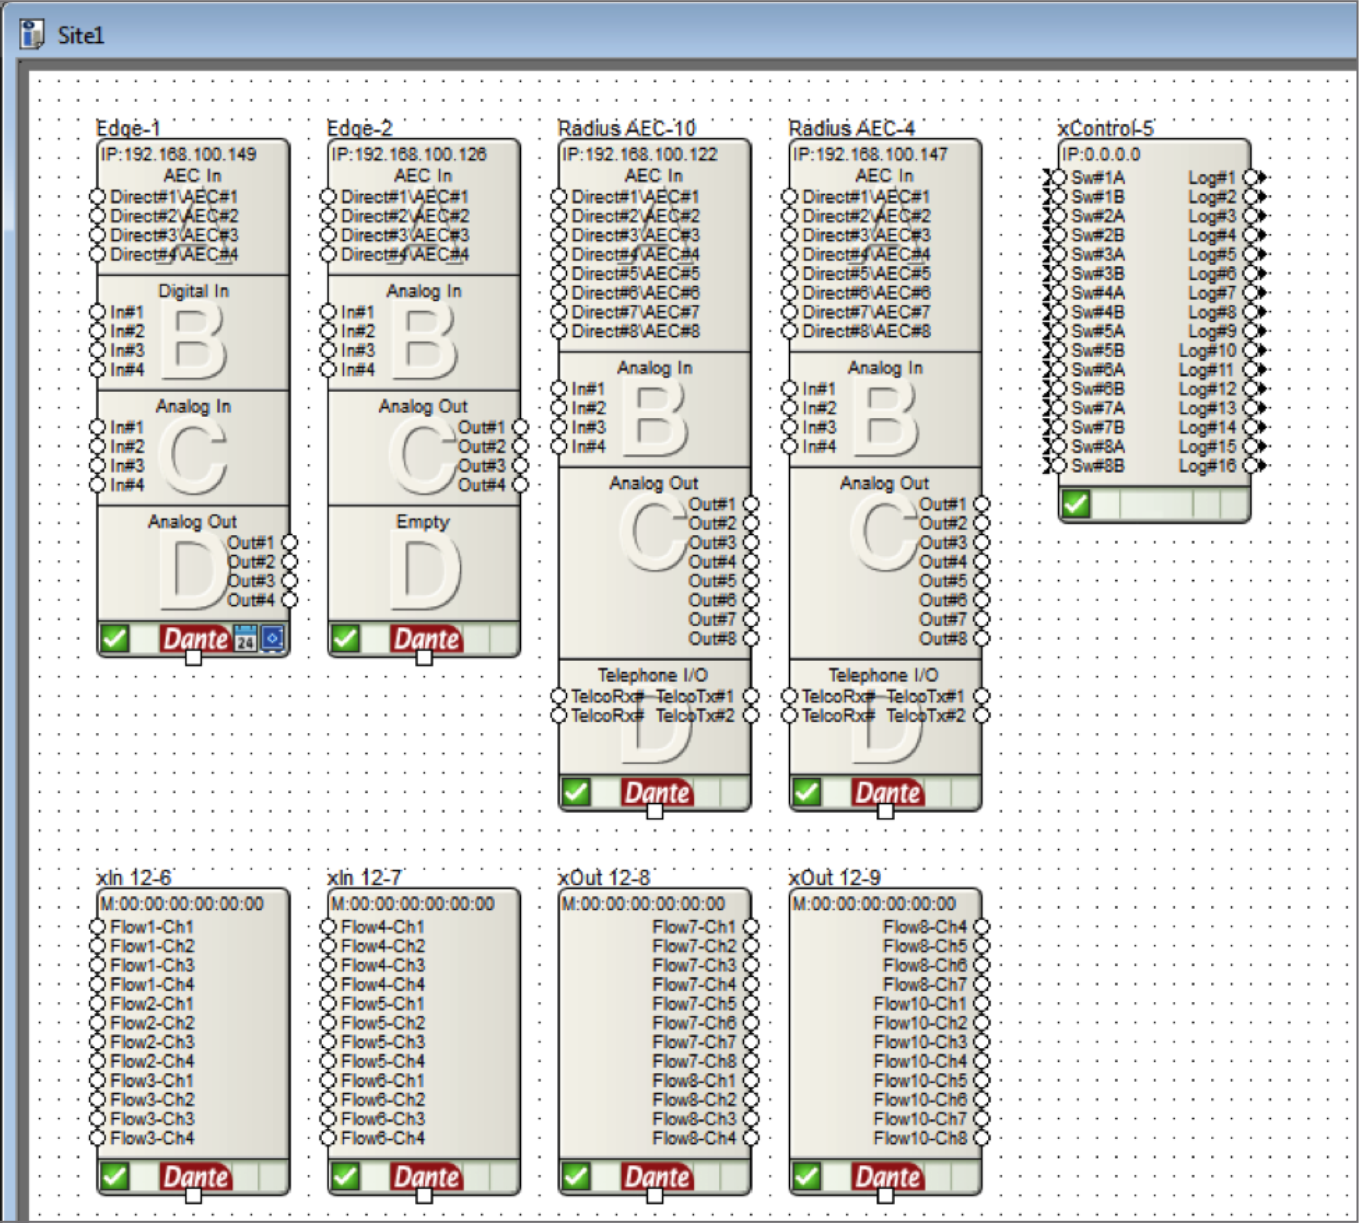
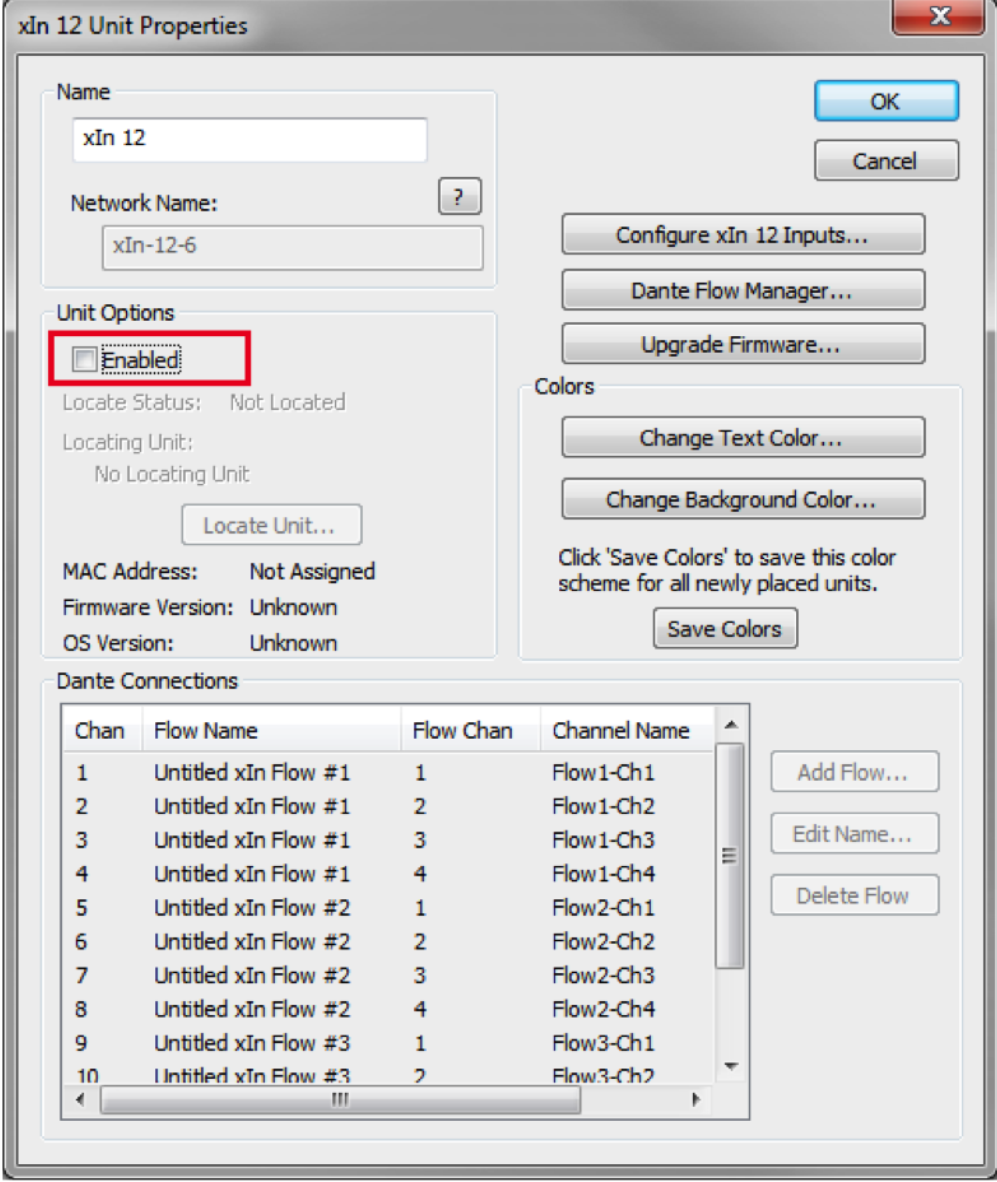
Then right click the xIO hardware and choose “Unit Properties”. When the Unit Properties window pops up, uncheck the enable box (highlighted in red below). Doing this will disable the unit from each subsequent push of the site file. Disabling a unit does not affect the unit’s functionality. To repeat, the
disabled units will continue to operate normally and communicate to the DSP hardware, they will simply be ignored by Composer software during the push process.
Once all xIO units are disabled, the push process will now update only the programming on the Edge, Radius NX, Prism, and D100. And as this document explains, over the course of the commissioning process, eliminating unnecessary units from being reprogrammed over and over will shave many minutes off the commissioning process.
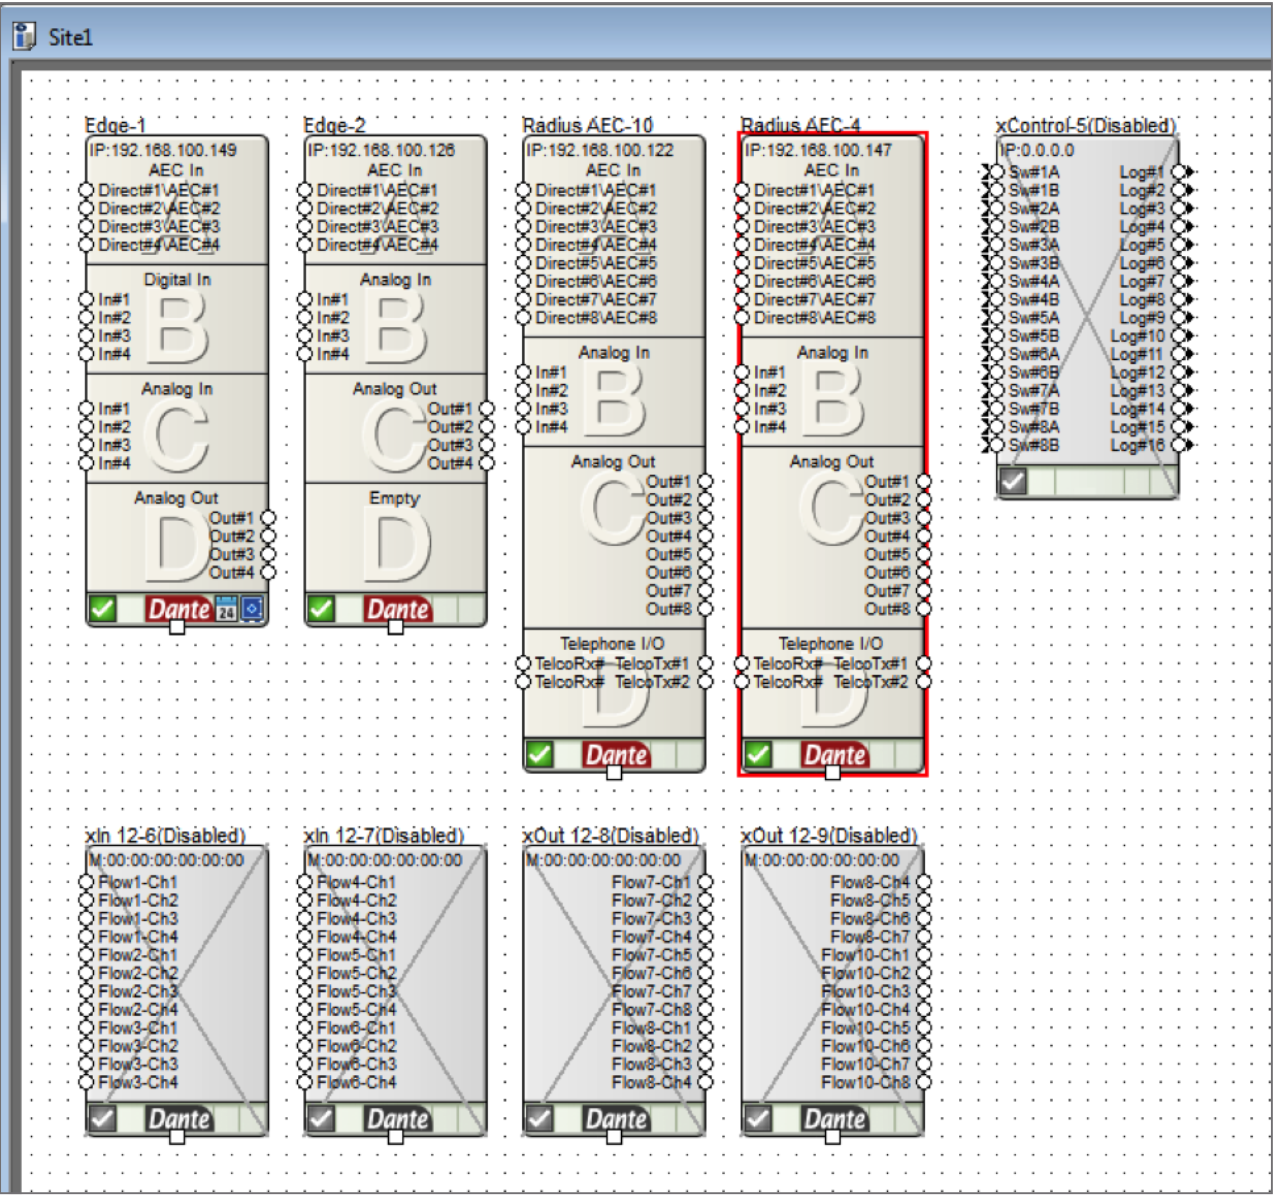
It should also be noted that at any time these disabled xIO units can have their configuration edited by simply checking “enable” in the Unit Properties, making the necessary changes, and pushing the file.